Complex Plumbing

How to Install a Stormwater Drainage System In New Zealand

Installing a stormwater drainage system

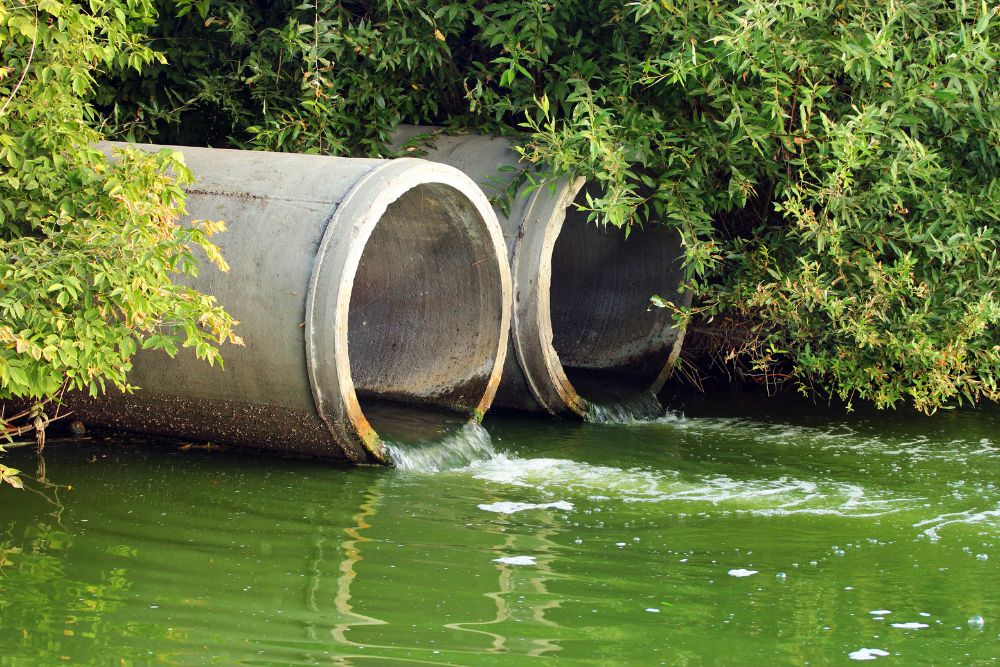
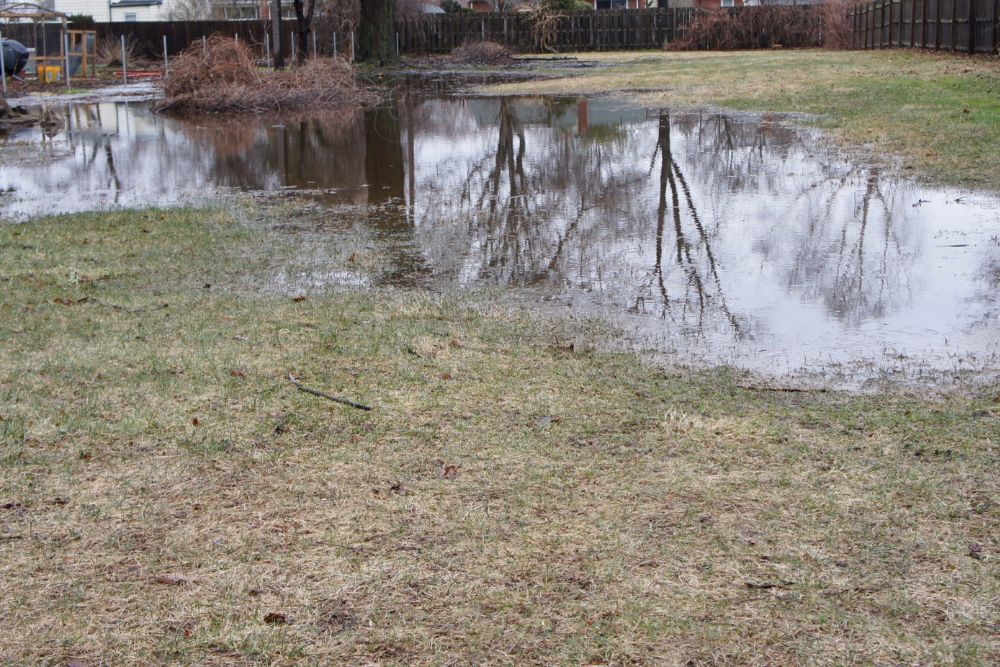
Are you tired of dealing with stormwater flooding your property and causing damage? Installing a stormwater drainage system is the ultimate solution to your woes.

From preventing erosion to safeguarding the environment, this system has got you covered.

But how exactly do you go about installing it?

In this discussion, we will explore the step-by-step process of planning, digging, preparing, and installing a stormwater drainage system in New Zealand.

The Process Of Installing a Stormwater Drainage System

Planning and Design

When planning and designing a stormwater drainage system, carefully analyse the grading around the property to determine the optimal location for installation. Start by assessing the slope of the land to ensure that the drainage system design allows for sufficient slope to direct water away from buildings and paved areas. This is crucial to prevent water from pooling and causing damage to structures or creating slippery surfaces.

Additionally, consider the placement of the channel drain to avoid interference with vehicle traffic paths. It’s important to choose a location that allows for easy access and maintenance without obstructing the movement of vehicles.

Before starting the installation process, make sure to prepare the area by clearing surfaces and ensuring the appropriate dimensions for trench digging. This will help create a suitable space for the drainage system and ensure proper functionality.

When installing the system, utilise pipe union end caps to direct water into the main drainage and ensure proper installation.
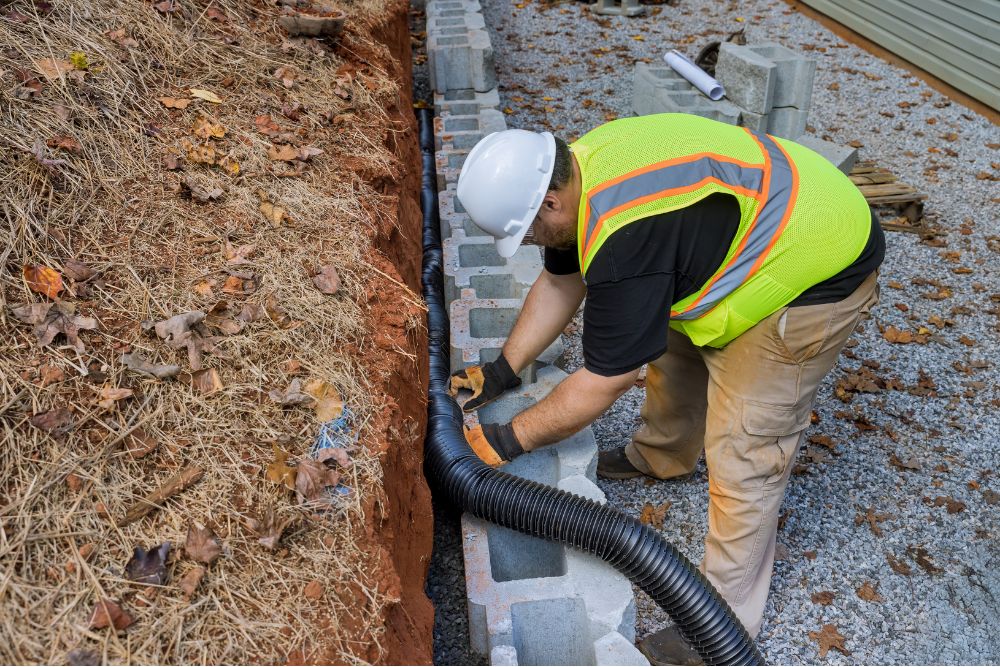
Digging the Trench

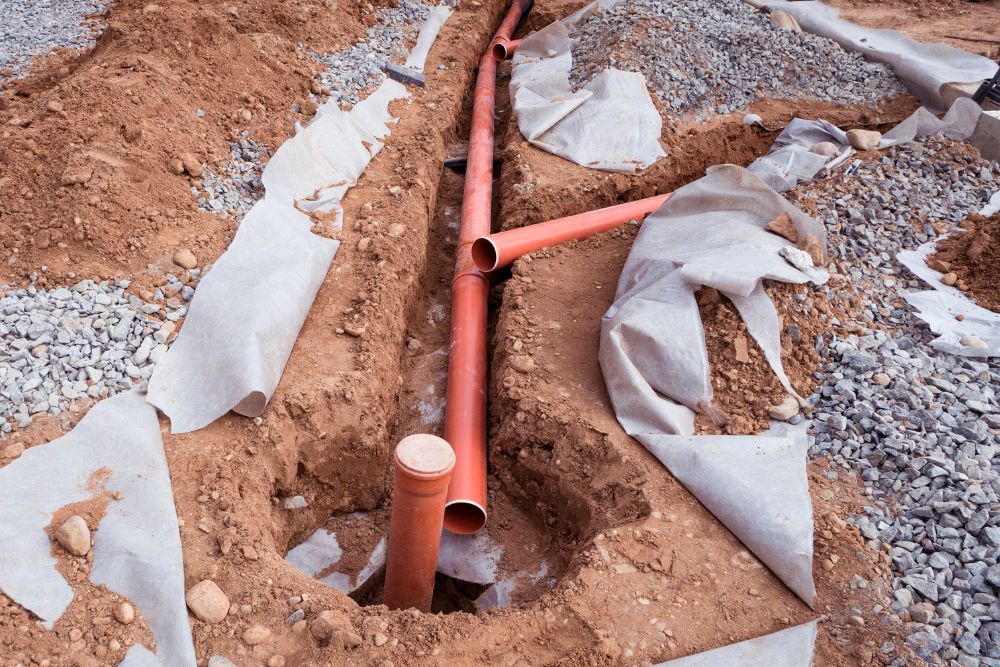
To properly prepare for the installation of a stormwater drainage system in New Zealand, the first step is to dig a trench of sufficient height and width to accommodate compacted sand at the base. It’s important to ensure that the trench has a fall of 5 mm per every 1 metre length of the channel drain. This slope is necessary to allow for proper water flow and drainage.

When digging the trench, it’s crucial to mark the depth every metre to maintain the appropriate slope. After digging the trench, it’s necessary to backfill it with a minimum of 100 mm of concrete on both sides. This will provide stability and support to the drainage system.

Once the trench is prepared, it’s time to start installing the channel drain. Begin at the lowest point and connect the lengths as you progress. Make sure to place the grate on the channel drain sections for accurate height alignment.

Preparing the Drainage System

Assess the grading and slope around your property to determine the optimal locations for drainage. This step is crucial in ensuring effective stormwater drainage.

Here are some key points to consider when preparing the drainage system:

  • Clear the area and hard surfaces before digging the trench. This will provide a clean and smooth surface for the installation process.
  • Verify and cut the channel drain lengths according to the required measurements. It’s important to gather all the necessary components and ensure the availability of joining systems.
  • Start the installation from the lowest point of the property. This will allow the water to flow naturally towards the drainage system.
  • Connect the channel drain lengths and place the grating on the sections with accurate height alignment. This will ensure that the water enters the drainage system smoothly.

Installing the Stormwater Drain

When it comes to installing the stormwater drain, it’s crucial to pay attention to the grading around your property. This will help you determine where the drainage should be installed to ensure effective water flow.

Once you have identified the ideal location, the next step is to dig a trench with sufficient height and width to accommodate compacted sand at the base. This will provide stability and support for the drainage system.

Before proceeding further, it’s important to verify that the channel drain lengths are correct and that the pre-formed outlet has been cut out accordingly.

To begin the installation, start from the lowest point where the section meets the drain. This will ensure proper water flow and prevent any potential blockages.

Finally, install the grating on top of the channel drain and seal it with tape or adhesive to secure it in place.
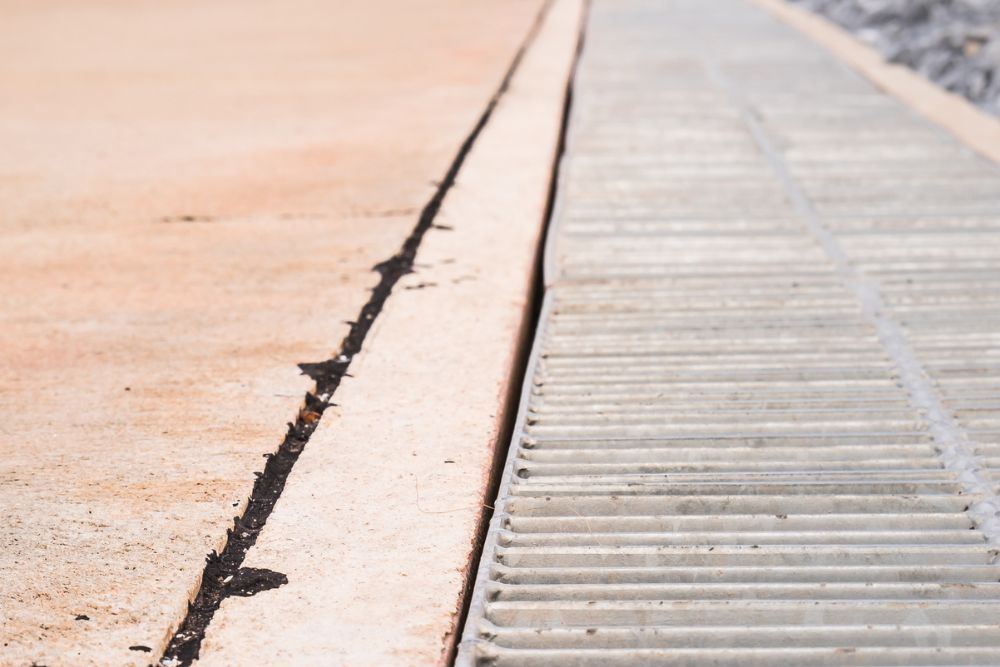
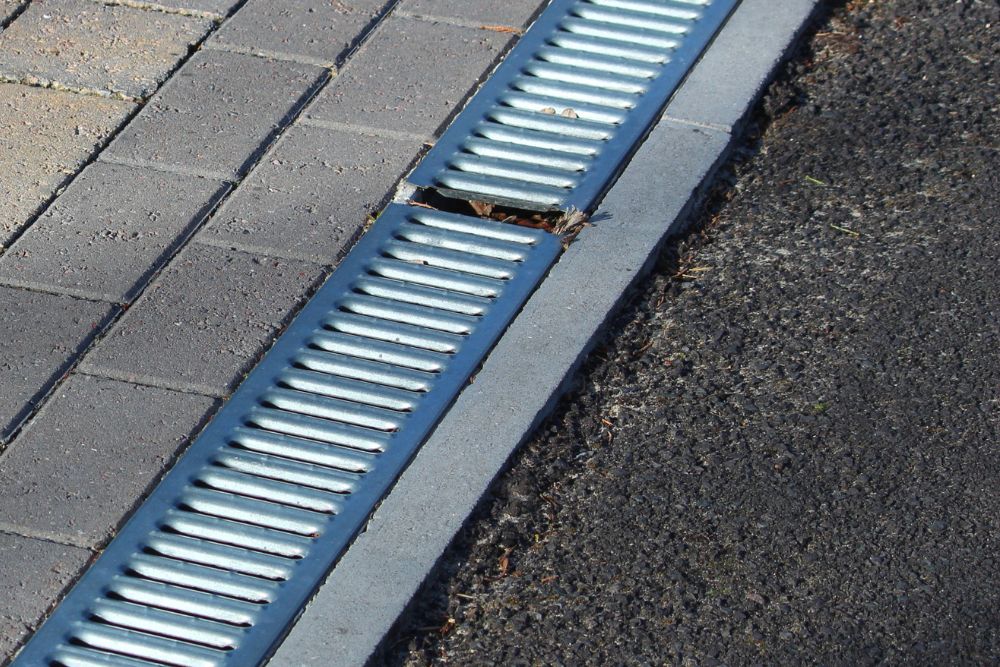
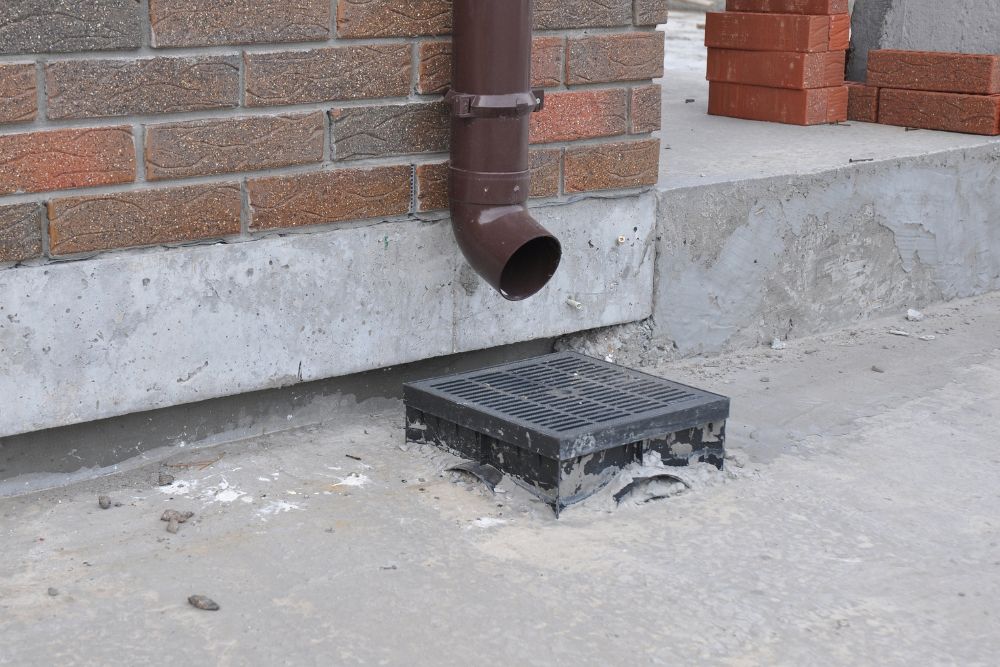
Placing the Grate

Now let’s talk about the points related to placing the grate.

Firstly, you need to position the grate correctly on top of the channel drain sections to ensure proper alignment.

Next, make sure to secure the grate by installing it and sealing it with tape or adhesive before pouring the concrete.

Lastly, it’s important to maintain the grate’s integrity by protecting it with exterior masking tape to prevent any damage during the concrete pouring process.

Positioning the Grate

To accurately align the height, place the grate on the channel drain sections when installing a stormwater drainage system. Positioning the grate correctly is crucial for effective drainage. Here are some important steps to follow:

  • Ensure the grate is installed at the lowest point: This allows water to flow naturally towards the drain and prevents any pooling or flooding.
  • Connect the lowest point to the drainage pipe: This ensures that water is efficiently directed away from the area, preventing any potential damage or water buildup.
  • Install the grating on top of the channel drain: Make sure it fits securely and is properly aligned with the surrounding surface.
  • Seal the grate with tape or adhesive: This helps to prevent any water leakage or debris from entering the drainage system.

Remember to protect the grated sections with exterior masking tape before pouring concrete and avoid removing the grate until the concrete has fully set.

Securing the Grate

To ensure proper alignment and fit, securely place the grate on top of the channel drain when securing it in the stormwater drainage system in New Zealand. This step is crucial in preventing any water leakage or debris from entering the system.

To accomplish this, use an appropriate adhesive or tape to seal the grating in place. Make sure to accurately position the grate before pouring concrete into the trench.

Once the concrete is poured, allow it to cure for at least 72 hours before applying any movement or pressure on the grate. It’s important not to remove the grate until the concrete is fully set to prevent any potential damage.

Maintaining the Grate

Securely place the grate on the channel drain sections to ensure accurate height alignment and prevent any water leakage or debris from entering the stormwater drainage system.

To maintain the grate, follow these steps:

  • Use exterior masking tape to protect the grated sections before pouring concrete.
  • Pour concrete into the trench, ensuring it’s at least 2 mm above the surface of the grate.
  • Allow the concrete to cure for a minimum of 72 hours before applying pressure.
  • Don’t remove the grate until the concrete is fully set.

Pouring Concrete for Stability

Pour concrete into the trench, ensuring the stability of the drainage system. Before pouring the concrete, make sure the trench is dug with enough space to accommodate compacted concrete.

Once the trench is ready, place the channel drain in it and connect the lengths as you progress. Ensure proper alignment and fall to guarantee effective water flow. Once the channel drain is in place, install the grating on top and seal it securely. This will prevent any debris or sediment from entering the drainage system.

Now, it’s time to pour the concrete. Slowly and carefully fill the trench with concrete, making sure it completely covers the channel drain. Use a trowel or shovel to spread and level the concrete as you go. Pay attention to any gaps or spaces between the concrete and the channel drain. Fill them in to ensure a solid and stable foundation.

Once the concrete is poured, allow it to cure for at least 72 hours before applying any pressure or using the drainage system. This curing period is crucial for the concrete to harden and gain strength, ensuring the stability of the drainage system for the long term.

For added durability, consider using stainless steel channels. They’re resistant to corrosion and can withstand harsh weather conditions. Additionally, always follow safety guidelines during installation and maintenance to ensure your own safety and the proper functioning of the stormwater drainage system.

Frequently Asked Questions

How Much Does It Cost to Install a Stormwater System?

The installation of a stormwater drainage system can vary depending on the size of your property and the complexity of the system. On average, you can expect to spend between $1,000 and $5,000 for a basic residential system. However, it’s always best to consult with us for a more accurate estimate.

What are the legal requirements for installing stormwater drainage in New Zealand?

You must comply with the New Zealand Building Code and local council regulations. This often involves obtaining a building consent for significant drainage work.

What are the common types of stormwater drainage systems used in New Zealand?

Common systems include soak pits, detention tanks, French drains, swales, and channel drains. The choice depends on your specific needs and site conditions.

Do I need a professional to install stormwater drainage?

For most significant installations, it’s advisable to hire a professional. This ensures that the system complies with local regulations and functions effectively.

How long does it take to install a stormwater drainage system?

The duration varies depending on the system’s complexity and size. Small systems may take a few days, while larger projects could take several weeks.

Conclusion

In conclusion, installing a stormwater drainage system in New Zealand requires careful planning, adherence to local regulations, and professional consultation.

By considering factors such as grading, trenching, and maintenance, property owners can effectively manage stormwater runoff and protect the environment.

It’s important to follow proper installation procedures, obtain necessary permits, and ensure the system is properly designed and maintained for a successful installation.

If you need to install a stormwater drainage system, be sure to contact us on 022 444 6474 or email info@complexplumbing.co.nz.

How Does Stormwater Drainage Work?

How does stormwater drainage work?

Have you ever wondered how stormwater drainage works in New Zealand?

It’s a fascinating system that ensures the efficient management of excess rainwater and protects communities from flooding. From the collection of runoff through gutters, pipes, and drains, to the filtration and retention of stormwater in storage areas, the process involves a complex network of infrastructure and natural features.

But that’s just the beginning. If you’re curious to learn more about the specific mechanisms and strategies used in stormwater management, stay tuned and discover the inner workings of this vital system.

Understanding the Basics of Stormwater Drainage

Stormwater drainage in New Zealand starts with the collection of rainwater runoff from roofs, roads, and other surfaces. Gutters and downpipes channel the water into a network of underground pipes, which carry it to stormwater drains. These drains are strategically located throughout urban and rural areas to efficiently collect and transport the stormwater away.

Once the stormwater enters the drains, it is directed to natural features such as rivers, streams, and wetlands, or to engineered storage areas. These storage areas, known as detention basins or ponds, are designed to temporarily hold the stormwater and release it at a controlled rate. This helps prevent flooding by reducing the peak flow of water downstream.

In addition to storage areas, stormwater management in New Zealand also involves the use of filtration systems. Stormwater treatment devices, such as sediment traps and bio-retention basins, are used to remove pollutants and sediments from the water before it is discharged into natural water bodies. These devices help protect the quality of our rivers, streams, and lakes.

The management of stormwater drainage is typically the responsibility of local authorities, such as city or district councils. They are in charge of planning, designing, and maintaining the stormwater infrastructure in their respective areas. This includes regular inspections and cleaning of drains, repairing or upgrading the system as needed, and ensuring compliance with environmental regulations.

Stormwater Catchment

To effectively manage stormwater runoff and prevent flooding, stormwater catchment systems in New Zealand collect runoff through various waterways, pipes, and channels. These catchment systems are designed to capture and redirect the excess water that accumulates during rainstorms and other weather events. They play a crucial role in preventing flooding and managing stormwater runoff from impervious surfaces such as roads, car parks, and buildings.

In New Zealand, stormwater catchment sources can include temporary channels, permanent structures, stormwater ponds, and retention basins. These structures are strategically placed to capture runoff and prevent it from overwhelming the surrounding areas. Additionally, drainage systems, manholes, and pits are incorporated into the catchment source to effectively manage stormwater flow.

Roadside drains and gullies also play a vital role in the stormwater catchment system. These features are designed to redirect water from roads and other paved surfaces into the catchment system, preventing it from pooling or causing damage to nearby properties and infrastructure.

Stormwater Storage or Retention Areas

Stormwater storage or retention areas are essential components of stormwater management, providing a space for capturing and filtering stormwater to reduce the risk of soil erosion and water pollution. Here are some key facts about stormwater storage or retention areas:

  • Wetlands: These areas play a vital role in stormwater management by naturally filtering pollutants and excess nutrients from stormwater runoff. Wetlands also serve as habitats for various plant and animal species.
  • Ponds: Stormwater ponds are designed to collect and temporarily store stormwater runoff. They help to slow down the flow of water, allowing sediment and pollutants to settle before the water is released back into natural waterways.
  • Basins: Stormwater basins are large, shallow depressions that collect and temporarily store stormwater. They’re designed to prevent flooding by slowly releasing the water into natural water sources over time, reducing the risk of overwhelming the drainage system.
  • Treatment Facilities: Some stormwater storage or retention areas are equipped with treatment facilities to further improve water quality. These facilities use various methods, such as settling tanks, filters, and biological processes, to remove pollutants and contaminants from the stormwater.

Discharge Points

Now, let’s talk about the discharge points in the stormwater drainage system. These points play a crucial role in releasing stormwater into natural water sources like rivers, lakes, or seas. It’s important to ensure that these discharge points comply with regulations and consent requirements to prevent water pollution and flooding.

In New Zealand, it’s necessary to adhere to the regulations set by the local authorities, such as the New Zealand Ministry for the Environment and the regional councils. These regulations ensure that stormwater is discharged safely and doesn’t cause harm to the environment.

The consent requirements for discharge points may vary depending on the region and the type of water body where the stormwater is being discharged. For example, in some areas, a consent may be required to discharge stormwater into a river, while in other areas, a consent may be needed for discharging into the sea.

To obtain consent, the discharge points must meet certain criteria. These criteria may include factors such as the quality of the stormwater being discharged, the volume of the discharge, and any potential impacts on the receiving water body.

To prevent water pollution, it’s important to ensure that the stormwater being discharged is of acceptable quality. This may involve treating the stormwater to remove pollutants or using best management practices to minimise pollution.

In addition to complying with regulations, it’s also important to consider the potential impacts of stormwater discharge on flooding. Discharging stormwater too quickly or in large volumes can increase the risk of flooding downstream. Therefore, it’s important to design discharge points that can handle the anticipated stormwater flows and prevent flooding.

The cost of complying with regulations and obtaining consent for discharge points can vary depending on the specific requirements of the local authorities. It’s advisable to consult with a qualified professional, such as a stormwater engineer or a consultant, to assess the requirements and estimate the costs involved.

Drainage Infrastructure

The efficient management of stormwater runoff relies on a well-designed network of drainage infrastructure, ensuring that water is directed to suitable locations for treatment and prevention of flooding and pollution.

Here are some key points about drainage infrastructure and discharge points:

  • Drainage infrastructure consists of pipes and channels that redirect stormwater runoff.
  • Discharge points lead to stormwater ponds, wetlands, or other filtration areas for water treatment.
  • Properly designed discharge points reduce the risk of soil erosion and contamination of natural water sources.
  • The infrastructure plays a vital role in the overall stormwater management system, protecting properties and the environment.

Environmental Impact

To minimise the environmental impact of stormwater discharge, it’s crucial to effectively manage the release of stormwater into natural water bodies. Discharge points, where stormwater is released into rivers, lakes, or oceans, can introduce pollutants, sediments, and debris into these water bodies. This can have a significant impact on aquatic ecosystems, degrading water quality and harming aquatic life. Contaminants carried by stormwater runoff can pose a threat to the health and biodiversity of the discharge locations.

Therefore, it’s essential to implement effective stormwater management practices at these discharge points. Compliance with regulations and best practices is necessary to mitigate the environmental effects of stormwater discharge and ensure the preservation of water quality in New Zealand’s natural water bodies.

Stormwater Treatment Systems

Now let’s talk about the different elements of stormwater treatment systems.

Filtration processes help remove pollutants by passing stormwater through various filter media.

Detention storage systems are designed to temporarily hold stormwater, allowing sediment to settle before the water is released.

Lastly, sustainable treatment options use natural processes, such as biofiltration, to remove contaminants.

These components work together to improve water quality and protect the environment.

Filtration Processes

Stormwater treatment systems employ a combination of physical and biological processes to effectively remove pollutants from runoff. These filtration processes play a crucial role in improving water quality before stormwater is discharged into natural waterways.

Here are four key components of filtration systems:

  • Sedimentation: This process allows heavy particles to settle at the bottom of a treatment system, removing sediment and debris from the stormwater.
  • Media Filtration: Stormwater passes through a filter medium, such as sand or activated carbon, which traps pollutants like heavy metals and hydrocarbons.
  • Biological Uptake: Plants and microorganisms in bio-retention cells and constructed wetlands absorb and transform nutrients, reducing their presence in the stormwater.
  • Nutrient Removal: Filtration systems can be designed to specifically target nutrients like phosphorus and nitrogen, which can contribute to water pollution.

Detention Storage Systems

Detention storage systems, an integral component of stormwater treatment systems, effectively manage stormwater quantity and quality by temporarily holding and allowing sediment and pollutants to settle. These systems play a crucial role in reducing peak flow rates and preventing flooding.

Detention storage systems can take various forms, such as underground tanks, ponds, or specially designed channels. By integrating these systems into the overall stormwater management infrastructure, they help control the release of stored stormwater at a controlled rate. This controlled release prevents flooding and reduces pollution by allowing sediment and pollutants to settle before the water is discharged.

Detention storage systems are designed to protect the environment and ensure the efficient management of stormwater in New Zealand.

Sustainable Treatment Options

To effectively treat stormwater and improve water quality, sustainable treatment options are implemented in New Zealand’s stormwater management systems. These options include:

  • Bioretention systems: These systems use plants and soil to filter pollutants from stormwater runoff, effectively improving water quality.
  • Infiltration systems: By allowing stormwater to percolate into the ground, infiltration systems reduce the volume of runoff and help recharge groundwater.
  • Constructed wetlands: These wetlands mimic natural wetlands and provide habitat for wildlife. They also effectively treat stormwater through natural processes.
  • Permeable pavement systems: These systems allow stormwater to infiltrate through the surface, reducing runoff and preventing pollution of water bodies.

These sustainable treatment options have been successfully implemented throughout New Zealand and have proven to be effective in improving water quality.

The cost of implementing these systems varies depending on the size and complexity of the project. On average, bioretention systems can cost between $5,000 to $20,000 per square meter, infiltration systems can cost between $10,000 to $30,000 per square meter, constructed wetlands can cost between $20,000 to $50,000 per hectare, and permeable pavement systems can cost between $100 to $200 per square meter.

These sustainable treatment options not only help protect and improve water quality but also contribute to the overall sustainability and resilience of New Zealand’s stormwater management systems.

Managing Stormwater

Managing stormwater involves implementing various strategies and systems to effectively control and mitigate the impact of rain and storm runoff. Stormwater catchment systems are utilised to collect and manage runoff from rain and storms. These systems consist of waterways, pipes, channels, ponds, basins, manholes, and roadside drains. They work together to prevent flooding by transferring stormwater away from built-up areas.

Gutters, pipes, and drains form a network that protects homes and businesses from potential damage caused by excessive rainfall. Rainwater harvesting systems are also employed to collect and store stormwater for reuse, reducing strain on water sources during periods of excessive rain or drought.

Another important aspect of managing stormwater is the use of surface drainage systems. These systems are designed to manage stormwater flows on roads and hard surfaces. They often utilise perforated concrete pipes, which allow water to drain through the surface and into underground storage or filtration systems. These surface drainage systems play a crucial role in overall stormwater management.

Stormwater storage and retention areas are essential for capturing and filtering stormwater. These areas help reduce the risk of soil erosion and water pollution by capturing runoff and allowing it to be filtered naturally before it enters natural water sources. These storage and retention areas are strategically placed throughout New Zealand to ensure proper management of stormwater.

Stormwater Infrastructure

Stormwater infrastructure plays a vital role in managing and controlling the flow of rain and storm runoff in New Zealand. Here are four key components of the stormwater infrastructure:

  • Stormwater catchment: This includes a network of waterways, pipes, channels, ponds, and retention basins that collect runoff from rain and storms. These systems help prevent flooding by directing the water away from built-up areas.
  • Rainwater harvesting systems: Designed to collect and store stormwater for reuse, these systems help reduce strain on water sources during excessive rain or drought. They contribute to sustainable water management practices.
  • Gutters, pipes, and drains: These form a network that collects and transfers stormwater, protecting buildings and infrastructure from flooding damage. They ensure that water is efficiently channelled away from structures.
  • Surface drainage systems: These systems manage stormwater flows on hard surfaces, such as roads and pavements, reducing the risk of flooding and protecting infrastructure. They include features like kerbs, gutters, and grated drains.

Frequently Asked Questions

Who Pays For Stormwater Management?

The cost of stormwater drainage infrastructure and maintenance is funded through rates and taxes. The exact cost varies depending on the size and complexity of the system in each area. However, on average, New Zealand households contribute around $300 to $500 per year towards stormwater management.

Where Does Stormwater Go in New Zealand?

Stormwater in New Zealand goes through a system of gutters, pipes, and drains. It is directed to catchment sources like ponds and basins, where it is filtered before entering natural water sources. The cost of maintaining stormwater systems in New Zealand is approximately $50 million per year. The stormwater infrastructure is designed to handle an average rainfall intensity of 15 millimeters per hour. The catchment basins have a capacity of 500 cubic meters and are equipped with sediment traps to remove pollutants. The stormwater management system in New Zealand is regulated by the Ministry for the Environment to ensure the protection of water quality and the environment.

Conclusion

In conclusion, stormwater drainage in New Zealand involves a combination of systems and infrastructure to manage runoff from rain and storms. Waterways, pipes, channels, and roadside drains collect and transfer stormwater to catchment sources, where it’s stored or retained in areas such as wetlands and ponds. This helps filter and reduce pollution before the stormwater enters natural water sources.

Proper stormwater management is essential for protecting water quality and preserving the environment.

Who Services Stormwater Drainage In New Zealand?

Who services stormwater drainage in New Zealand?

Do you ever wonder who services the stormwater drainage in New Zealand?

The responsibility for servicing stormwater drainage is divided between property owners and the local government.

But who exactly does what? How are private and public stormwater assets managed? And why is this maintenance so important?

Stick around, because we’re about to dive into the fascinating world of stormwater management in New Zealand. You won’t want to miss it!

Who Is Responsible For Stormwater Drainage?

In New Zealand, the management of stormwater drainage is shared between property owners and the local council. Property owners are responsible for maintaining stormwater assets on their own land, such as gutters, downpipes, and private drains. They are also responsible for managing stormwater runoff from their properties, ensuring it does not cause flooding or pollution.

On the other hand, the local council is responsible for maintaining public stormwater assets, including drains, pipes, and culverts that are located on public land or within road reserves. The council is also responsible for managing stormwater systems to prevent flooding and pollution. This includes regular inspections, maintenance, and upgrades of public stormwater infrastructure.

The cost of stormwater management is shared between property owners and the local council. Property owners contribute to the cost through their rates, which are paid to the council. The council uses these funds to maintain and improve public stormwater infrastructure.

Stormwater management is crucial in New Zealand due to its high rainfall and the potential for flooding. By properly managing stormwater, we can reduce the risk of flooding, protect water quality, and ensure the health and safety of our communities. This is why it is important for property owners and the local council to work together to maintain and manage stormwater drainage effectively.

Local Council and Government Agency Roles In Stormwater Drainage

In New Zealand, stormwater management and maintenance responsibilities are divided between local councils and government agencies. Their main objective is to reduce flooding and prevent water pollution by managing both public and private stormwater assets.

As a property owner, it is your responsibility to maintain your private stormwater assets. If you plan on constructing private drains, you will need consent from your neighbours. The Auckland Council owns, maintains, and keeps records of the public stormwater assets in Auckland. Therefore, if you encounter any problems with the public stormwater infrastructure, it is important to reach out to the Auckland Council.

In addition to the maintenance responsibilities, there are certain requirements that need to be met in terms of resource consents. If your property has more than 60% cover by impervious surfaces, is larger than 1000m², or is involved in industrial and trade processes, you will need resource consents. These regulations aim to ensure proper stormwater management and maintenance throughout New Zealand.

Responsibilities of Stormwater Drainage

When it comes to stormwater drainage, the responsibilities of managing and maintaining private stormwater assets fall on property owners in New Zealand. Here are some important points to keep in mind regarding these responsibilities:

  • Property owners are responsible for maintaining private stormwater assets on their property. This includes regular inspections, cleaning, and repairs if needed.
  • Consent from neighbours is required to construct private drains. It’s essential to obtain permission and discuss any potential impacts on neighbouring properties.
  • Contact your local council or government agency for assistance in determining responsibility for a stormwater asset or to connect pipes to the public network. They can provide guidance and information on the necessary steps to take.
  • Private stormwater assets can appear on private land. It’s crucial to understand the boundaries of your property and ensure that you’re managing and maintaining the stormwater assets within your boundaries.
  • The boundary between public and private stormwater pipes is where private stormwater pipes connect to the public network. Property owners are responsible for the maintenance and repairs of the private pipes up to this connection point.

Taking these responsibilities seriously is essential to ensure the effective functioning of stormwater drainage systems and to prevent any adverse impacts on the environment and neighbouring properties.

Private Vs. Public Stormwater Assets

Property owners in New Zealand have the responsibility of maintaining private stormwater assets on their property. These assets can include drains, pipes, and other infrastructure that manage stormwater runoff on the property. It’s important for property owners to ensure that these assets are regularly inspected and maintained to prevent any issues or blockages that could lead to flooding or other problems.

When it comes to constructing private stormwater assets, consent from neighbours is required. This is to ensure that the construction doesn’t interfere with any existing stormwater infrastructure on neighbouring properties. It’s also important to note that the boundary between public and private stormwater pipes is determined by where the private pipes connect to the public network or where the connection crosses into a neighbour’s property or a reserve.

On the other hand, public stormwater assets in New Zealand, particularly in Auckland, are owned, maintained, and recorded by the Auckland Council. This means that the responsibility for maintaining and managing these assets lies with the council. Property owners can access downloadable PDFs that provide information on their rights and responsibilities during the maintenance of public stormwater assets.

If you’re unsure about the responsibility for a specific stormwater asset or need assistance in connecting your private pipes to the public network, it’s recommended to contact the relevant authorities for clarification and guidance. They’ll be able to provide you with the necessary information and support to ensure the proper management of stormwater assets in your area.

Maintenance of Stormwater Infrastructure

To ensure the proper maintenance of stormwater infrastructure, property owners in New Zealand must take responsibility for the regular inspection and upkeep of their private stormwater assets. This is crucial in preventing blockages, flooding, and environmental damage. Here are some important points to consider:

  • Regular inspection: Property owners should regularly inspect their private stormwater assets, including drains, pipes, and gutters, to identify any signs of damage or blockages. This can help address issues before they escalate and cause more significant problems.
  • Cleaning and maintenance: Regular cleaning of stormwater assets is essential to prevent the accumulation of debris and pollutants, which can lead to blockages and hinder proper drainage. Property owners should ensure that their assets are regularly cleaned and maintained to keep them in optimal condition.
  • Compliance with regulations: Property owners must comply with stormwater regulations set by local councils. This includes ensuring that stormwater assets are properly installed, maintained, and meet the required standards. Compliance with these regulations is necessary to protect the environment and maintain the functionality of the stormwater system.
  • Seeking professional assistance: If property owners are unsure about how to maintain their stormwater assets or encounter complex issues, it’s advisable to seek professional assistance. Companies like SiteCare provide comprehensive stormwater maintenance services with years of experience in New Zealand.

Frequently Asked Questions

Who Is Responsible for Blocked Stormwater Drain?

You are responsible for a blocked stormwater drain on your property. The local council is responsible for blocked public stormwater drains. Contact the appropriate council in your area for assistance in determining responsibility or to connect pipes to the public network.

Do Downpipes Have to Be Connected to Stormwater?

Yes, downpipes need to be connected to the stormwater system in New Zealand. It is the responsibility of property owners to ensure proper connection to manage rainwater effectively and prevent flooding or drainage issues. Failure to comply with this requirement can result in fines of up to $10,000.

Who Is Responsible for Culverts In New Zealand?

The responsibility for stormwater culverts typically falls under local government authorities, such as city or district councils.

In some cases, the New Zealand Transport Agency (NZTA) may also be involved, especially when the stormwater infrastructure intersects with state highways or other significant transport infrastructure.For private property, the responsibility for maintaining any stormwater systems, including culverts, typically lies with the property owner.

However, any modifications or significant maintenance work may require approval or consultation with the local council to ensure compliance with local regulations and standards.

Conclusion

So, in conclusion, when it comes to stormwater drainage in New Zealand, the responsibility is divided between property owners and the local government.

Property owners are responsible for maintaining private stormwater assets on their property, while the local government handles the maintenance and repairs of public stormwater infrastructure.

It’s important for both parties to fulfil their responsibilities to ensure proper functioning of the stormwater system and prevent any issues or damage.

If you need assistance with your stormwater drainage, contact us now on 022 444 6474 or email info@complexplumbing.co.nz.

How to Improve Lawn Drainage In New Zealand

How to Improve Lawn Drainage In NZ

Are you tired of dealing with a soggy and waterlogged lawn? Well, fear not, as there are solutions to improve your lawn drainage and restore the beauty of your outdoor space.

In this blog we will cover the causes of poor lawn drainage and uncover the secrets to achieving a well-drained and thriving lawn.

Ways to Improve Lawn Drainage

One effective solution is to install a subsoil drainage system. This involves digging trenches and laying perforated pipes filled with gravel. The pipes will collect excess water and direct it away from your lawn. The cost for this type of drainage system can range from $500 to $2000, depending on the size of your lawn and the materials used.

Another option is to aerate the soil. This can be done using a lawn aerator machine or by manually inserting a garden fork into the ground. Aeration helps to break up compacted soil and allows water to penetrate deeper into the ground. The cost for renting a lawn aerator machine is around $50 to $100 per day.

You can also improve drainage by adding organic matter to your soil. This can be done by top-dressing your lawn with compost or well-rotted manure. The organic matter will help to improve the soil structure and drainage capabilities.

In addition to these solutions, it’s important to regularly maintain your lawn to prevent drainage issues. This includes keeping the grass at a suitable height, avoiding overwatering, and ensuring proper soil fertility.

The Process Of Improving Lawn Drainage

Identify the Problem Areas

To identify problem areas with poor lawn drainage, begin by checking for:

  • Standing water
  • Pooling or flowing water during rainfall
  • Soggy soil
  • Areas where water accumulates after irrigation or heavy rain

Evaluating your existing landscaping is an important step in this process. Take note of any changes in the terrain or landscaping features that may contribute to drainage issues. For example, if you have recently added a new flower bed or installed a pathway, these changes could impact the flow of water.

Additionally, consider the proximity of your house and other structures to potential problem areas. If water consistently collects near your foundation or against the walls of your home, it could lead to significant damage over time.

Seeking professional advice is highly recommended when dealing with lawn drainage issues. A professional landscaper or drainage specialist can assess your yard and provide expert guidance on the best solutions for improving drainage. They’ll be able to identify the specific problem areas and recommend appropriate measures to address them.

Don’t hesitate to reach out for professional help, as it can save you time, money, and frustration in the long run.

Evaluate the Soil Composition

Assess the soil composition to determine its ability to effectively drain water. Evaluating the soil composition is crucial in improving lawn drainage. One factor to consider is assessing soil fertility. Fertile soil contains essential nutrients that promote healthy plant growth and can contribute to better drainage. Understanding soil pH is also important. Soil pH affects the availability of nutrients to plants and can impact the overall health of the lawn.

Testing the soil’s drainage capability can be done by digging a hole and filling it with water. Observe how quickly the water drains to determine if there are any issues. Additionally, the soil texture plays a significant role in drainage. Sandy soil tends to drain well, while clay soil retains water and can cause waterlogging. Loam soil, which is a mixture of sand, silt, and clay, is generally ideal for good drainage.

Lastly, evaluating the organic matter content in the soil is essential. Organic matter improves soil structure, allowing for better water infiltration and drainage. Identifying the appropriate plants for the specific soil conditions can also help prevent further waterlogging issues.

Implement Proper Grading Techniques

Improve your lawn drainage by utilising effective grading techniques. Proper grading is of utmost importance when it comes to ensuring proper water flow and preventing waterlogged areas in your lawn. Here are some common grading mistakes to avoid:

  1. Inadequate slope: A flat or improperly sloped lawn can result in water accumulation and poor drainage. Ensure that your lawn is graded with a gentle slope to allow water to flow away from the surface.
  2. Incorrect levelling: Uneven surfaces can lead to standing water and create breeding grounds for pests and diseases. Take the time to level your lawn properly, removing any dips or bumps that could hinder drainage.
  3. Improper soil compaction: Compacted soil prevents water from penetrating the surface and causes it to run off instead. Use proper techniques to aerate and loosen the soil, promoting better drainage.
  4. Neglecting surface runoff: Failing to redirect surface runoff can result in water pooling in certain areas. Consider installing gutters, downpipes, or swales to divert water away from your lawn.

Install a Drainage System

If your lawn is experiencing consistent water accumulation issues, one effective solution is to install a drainage system. By installing a drainage system, you can redirect excess water away from problem areas in your yard, preventing waterlogging and potential damage to your lawn.

Before starting the installation process, it’s important to survey your property to determine where the water is coming from. This will help you identify the best location to extend the drainpipe or sump pump discharge.

Creating a drainage plan is also crucial. Make a sketch of your property to identify high and low spots, and consider building a rain garden or dry well if draining to another location isn’t possible.

When installing the drainage system, start by digging a trench. Then, lay perforated pipes in the trench and backfill it with rocks and soil. This will allow the water to flow into the pipes, which will then redirect it away from your lawn.

Another option you can consider is installing a French drain, which is a trench filled with gravel or rock that helps collect and redirect water.

With proper installation, a drainage system can significantly improve the drainage of your lawn, keeping it healthy and free from water accumulation issues.

Maintaining Regular Lawn Care Practices

To maintain proper lawn drainage and minimise water accumulation, regularly incorporate lawn care practices such as regular mowing, trimming, and aerating the soil. These practices not only ensure a well-maintained lawn but also help improve drainage by preventing water from pooling on the surface.

Here are some important steps to follow:

  1. Identify problem areas: Take note of areas in your lawn where water tends to accumulate or where the soil feels overly wet. These problem areas might require additional attention and specific care.
  2. Assess soil composition: Understanding the composition of your soil can provide valuable insights into its drainage capabilities. Conduct a soil test to determine its pH level, nutrient content, and overall structure. This assessment will help you identify any deficiencies and take appropriate measures to improve drainage.
  3. Mow and trim regularly: Keeping your lawn at a proper height promotes healthy drainage. Regularly mowing and trimming the grass prevents it from becoming too long, which can impede water flow and contribute to poor drainage.
  4. Aerate the soil: Regularly aerating the soil allows for better water penetration. By creating small holes in the ground, you encourage the movement of air, water, and nutrients throughout the soil, promoting healthy root growth and improving drainage.

Frequently Asked Questions

How Do You Fix Poor Drainage in Your Lawn?

To fix poor drainage in your lawn, start by identifying common drainage problems such as pooling water or soggy areas. Look for signs of poor lawn drainage like mould or dying grass. Then, consider solutions like levelling the lawn or installing a drainage system.

What Is the Best Drainage System for a Lawn?

The best drainage system for your lawn depends on the specific drainage issues you’re facing. Common lawn drainage issues include water pooling, waterlogging, and poor water infiltration. Proper assessment and techniques like French drains or underground pipes can help improve drainage.

How Do You Fix Soil That Won’t Drain?

To fix soil that won’t drain, start by improving soil compaction. Use a tiller or aerator to loosen the soil. Consider installing drain tiles to redirect excess water. These steps can help improve drainage in your lawn.

Conclusion

Improving lawn drainage in New Zealand is essential for maintaining a healthy and functional outdoor space. By identifying problem areas, evaluating soil composition, implementing proper grading techniques, installing drainage systems, and maintaining regular lawn care practices, homeowners can effectively address drainage issues.

Whether it’s redirecting water away from problem areas or creating designated walkways, taking action to improve lawn drainage will help prevent water buildup and promote a lush and thriving lawn.

If you need help resolving your lawn drainage, speak to us today by calling 022 444 6474 or emailing info@complexplumbing.co.nz.

How to Calculate the Size of a Subsoil Drainage Pit

Subsoil drainage pit

Ever pondered on how to calculate the size of a subsoil drainage pit? It might appear as a complex task, but with the correct knowledge and guidance, you can determine the ideal dimensions for effective drainage. By taking into account factors such as rainfall, soil percolation rate, and surface area to drain, you can ensure that your drainage pit is designed to efficiently manage surplus water.

But there’s more – there are other vital elements to consider, such as the depth of the pit and the size of the drainage pipe. Hence, if you’re keen to learn more about this crucial aspect of drainage system planning, continue reading to discover the step-by-step process of calculating the size of a subsoil drainage pit.

Assessing the Drainage Needs

To evaluate the drainage requirements for your subsoil drainage pit, take into account the volume of water build-up and the degree of soil saturation in the region. Begin by examining the soil composition to ascertain its permeability. Different types of soil have varying levels of drainage capability, with sandy soil being more permeable than clay soil.

By assessing the current drainage systems in the region, you can pinpoint potential problems or areas that require improvement. Look out for signs of water pooling or excessive dampness, as these signal poor drainage. Furthermore, consider the gradient of the land and its impact on water flow. If the region is relatively level, installing a subsoil drainage pit may be necessary to avert water build-up and potential damage to structures or vegetation.

A meticulous analysis of these factors will aid in determining the size and capacity of the subsoil drainage pit needed to effectively manage water drainage in the region.

Determining the Average Rainfall

To ascertain the average rainfall in your area, you can analyse rainfall data collected over a period of time.

There are various methods to measure rainfall, such as using rain gauges or weather stations.

Once you have gathered the necessary data, you can calculate the average precipitation to understand the amount of rainfall your soak pit needs to manage.

Rainfall Data Analysis

Determining the average rainfall can be accomplished through the analysis of rainfall data. This analysis is vital for various purposes, such as rainwater harvesting and groundwater recharge.

By examining historical rainfall data, you can calculate the average rainfall over a specific period, usually measured in years. To start the analysis, collect rainfall records from reliable sources, such as meteorological stations or government agencies. Ensure that the data covers a significant period, ideally spanning several decades, to obtain a more accurate average.

Once you have the data, add up the total rainfall for each year and divide it by the number of years to find the average. This information is crucial in determining the size of a subsoil drainage pit, as it helps estimate the amount of water that needs to be managed effectively.

Rainfall Measurement Methods

One effective method for determining the average rainfall is by analysing historical rainfall data collected from reliable sources. Precise rainfall data is essential for various purposes like water resource management, irrigation planning, and flood control.

To measure rainfall, different techniques are used, such as rain gauges, weather radar, and satellite observations. Rain gauges are the most common and simplest method, where a container collects and measures the amount of rainfall in millimetres.

Weather radar uses radio waves to detect precipitation and estimate its intensity and movement. Satellite observations provide a broader view by measuring rainfall over large areas in square kilometres.

These rainfall measurement techniques help in obtaining accurate and reliable data, allowing for better planning and decision-making in various fields that depend on rainfall patterns.

Calculating Average Precipitation

You can calculate the average precipitation by analysing historical rainfall data collected from reliable sources. Measuring rainfall accurately is crucial for determining the average rainfall in a specific area. By analysing historical rainfall data, you can get a better understanding of the rainfall patterns and trends over a certain period. This data helps in estimating the average amount of rainfall that occurs in a particular location.

To calculate the average precipitation, you need to gather rainfall data for a significant period, such as several years. This data can be obtained from meteorological organisations, government agencies, or weather stations. Once you have collected the data, you can calculate the average precipitation by summing up the rainfall values and dividing it by the number of years or months included in the dataset.

Here is an example of how you can calculate the average precipitation using historical rainfall data:

Year Rainfall (mm)
2018 800
2019 650
2020 900

To calculate the average precipitation for these three years, you add up the rainfall values (800 + 650 + 900 = 2350) and divide it by the number of years (3). In this case, the average precipitation would be 783.33 mm.

Analysing historical rainfall data provides valuable insights into the average precipitation in a specific area, helping you make informed decisions when designing drainage systems or managing water resources.

Calculating the Surface Area to Drain

Determining the Surface Area to Drain

To accurately determine the surface area that needs to be drained, it’s crucial to take into account the size and layout of the subsoil drainage pit. The surface area to drain refers to the aggregate area of the ground that will be contributing water to the drainage system.

Here are three important factors to bear in mind when determining the surface area to drain:

  • Calculating drainage capacity: Prior to determining the surface area to drain, you need to know the drainage capacity of the subsoil drainage pit. This is the amount of water the pit can handle per unit of time. By comprehending the drainage capacity, you can ensure that the surface area to drain adequately caters for the water flow.
  • Determining drain pipe length: The length of the drain pipes connected to the subsoil drainage pit will also influence the surface area to drain. Longer drain pipes necessitate a larger surface area to drain in order to effectively collect and remove water from the surrounding area.
  • Considering the slope of the land: The gradient of the land also plays a vital role in determining the surface area to drain. Steeper gradients tend to generate a higher volume of runoff, which means a larger surface area to drain is required to handle the increased water flow.

Estimating the Percolation Rate of the Soil

Estimating the percolation rate of the soil can be achieved by conducting a simple infiltration test. This test assists in ascertaining how rapidly water can penetrate the soil, which is fundamental for calculating the size of a subsoil drainage pit.

To carry out the infiltration test, adhere to these steps:

  1. Select a representative area: Opt for an area in the proximity of the planned drainage pit that’s similar in soil composition and slope.
  2. Dig a hole: Dig a hole that’s approximately 30 centimetres deep and wide enough to accommodate a 15-centimetre diameter cylindrical container.
  3. Conduct the test: Fill the hole with water and allow it to drain completely. Once drained, refill the hole and measure the water level at regular intervals. Record the time it takes for the water level to drop by 2.5 centimetres.

Determining the Depth of the Drainage Pit

To ascertain the depth of the drainage pit, assess the water table level in the adjacent area. This step is paramount in guaranteeing that the drainage pit is effective in managing groundwater.

Below are three significant factors to contemplate when ascertaining the depth:

  • Estimating groundwater levels: Comprehending the level at which groundwater is present in the area is vital. This can be accomplished by studying local water tables or consulting with experts. The depth of the drainage pit should be beneath the water table to ensure effective drainage.
  • Assessing soil permeability: The permeability of the soil plays a notable role in ascertaining the depth of the drainage pit. If the soil has low permeability, the drainage pit may need to be deeper to ensure proper water flow. Conducting soil tests or consulting with geotechnical engineers can provide valuable insights into the soil’s permeability.
  • Gradient of the surrounding area: The gradient of the land can affect the depth of the drainage pit. If the surrounding area has a steep gradient, a deeper drainage pit might be necessary to prevent water from pooling or causing erosion. Evaluating the land’s topography can help determine the suitable depth for the drainage pit.

Calculating the Required Volume of the Pit

Let’s now concentrate on ascertaining the necessary volume of the pit, taking into account elements such as the size of the area to be drained and the expected quantity of water to manage. Accurately determining the required volume of the pit is vital for proficiently designing the subsoil drainage system.

To begin, you must compute the excavation cost by multiplying the length, width, and depth of the pit. This will provide you with the total volume of soil that requires removal. Bear in mind that the excavation cost will hinge on the specific rates given by contractors in your locality.

Subsequently, you need to identify the required gravel quantity. This can be achieved by considering the volume of water that requires management. The gravel serves as a filter and assists in the drainage process. It’s advised to utilise a gravel layer that’s at least 300mm thick.

To calculate the required gravel quantity, you can multiply the volume of the pit by the advised gravel thickness. This will provide you with the total volume of gravel required for the drainage pit.

Selecting the Right Drainage Pipe Size

Choosing the appropriate size for the drainage pipe is a pivotal step in designing an efficient subsoil drainage system. The size of the pipe will determine how well the water can flow through the system and prevent potential malfunctions. When selecting the right drainage pipe size, keep the following factors in mind:

  • Flow rate: Take into account the expected amount of water that will need to be drained from the area. A larger flow rate will necessitate a larger pipe size to accommodate the volume of water.
  • Pipe materials: Different materials have varying flow capacities and durability. Evaluate the suitable pipe materials based on the specific needs of your drainage system. Factors such as soil conditions, the presence of corrosive substances, and the expected lifespan of the system should be considered.
  • Potential malfunctions: Carefully evaluate potential malfunctions that may occur if the incorrect pipe size is chosen. These malfunctions may include blockages, overflow, or inadequate drainage. By choosing the right pipe size, you can minimise the risk of these malfunctions and ensure the effectiveness of the subsoil drainage system.

Finalising the Size of the Subsoil Drainage Pit

Now that you have chosen the appropriate drainage pipe size, it’s time to finalise the size of your subsoil drainage pit.

There are a few factors to take into account when determining the size of the pit. First, consider the pit size factors. These include the amount of water that needs to be drained, the soil type and its permeability, and the slope of the land where the pit will be located.

Next, calculate your drainage requirements. This involves estimating the amount of water that will be entering the pit during heavy rainfall or other drainage events. This can be done by considering factors such as the size of the area being drained and the average rainfall in your region.

Finally, determine the dimensions of the pit. This will depend on the drainage requirements calculated earlier and the available space on your property. The pit should be large enough to accommodate the water flow without overflowing or causing any flooding issues.

Pit Size Factors

To finalise the size of the subsoil drainage pit, take into account various factors that will determine its optimal dimensions.

These factors include:

  • Assessing soil type: The type of soil in your area plays a pivotal role in determining the size of the drainage pit. Clay soils, for example, have poor drainage capabilities and may necessitate a larger pit to effectively remove surplus water.
  • Evaluating groundwater levels: Comprehending the groundwater levels in your location is crucial for determining the size of the pit. If the groundwater is high, a larger pit may be required to accommodate the increased water volume.
  • Surface area and catchment: The size of the surface area that drains into the pit, known as the catchment, should also be taken into account. A larger catchment area will necessitate a larger pit to ensure effective drainage.

Calculating Drainage Requirements

Evaluating the precise drainage requirements is crucial when finalising the size of the subsoil drainage pit. To accurately calculate the drainage needs, you must firstly assess the soil composition and analyse the groundwater levels in the area.

The soil composition plays a pivotal role in determining how water flows through the ground. Different types of soil have varying permeability, affecting how swiftly water can be drained. By evaluating the soil composition, you can determine the drainage capacity required for effective water removal.

Additionally, analysing the groundwater levels helps determine the quantity of water that needs to be drained from the area. If the groundwater levels are high, a larger drainage pit may be necessary to accommodate the excess water.

Determining Pit Dimensions

To finalise the size of the subsoil drainage pit, you can determine the pit dimensions by considering the soil composition and groundwater levels in the area.

Assessing the soil composition is crucial in understanding how water will flow through it. Sandy soils, for example, drain quickly, while clay soils retain water. By knowing the soil composition, you can estimate the amount of water that will accumulate in the pit.

Additionally, considering groundwater levels is essential to prevent the pit from becoming overwhelmed with water. If the groundwater levels are high in your area, you may need to increase the size of the pit to accommodate the additional water.

Frequently Asked Questions

What Materials Are Commonly Used for Subsoil Drainage Pits?

Various kinds of subsoil drainage systems utilise diverse materials for drainage pits. Gravel is commonly utilised due to its efficacy in fostering water flow. However, it carries the downside of potentially blocking over time.

Are There Any Regulations or Permits Required for Installing a Subsoil Drainage Pit?

Prior to determining the size of a subsoil drainage pit, it’s crucial to consider the rules and permissions needed for installation. Check local building codes and secure the necessary permissions to ensure adherence to rules.

How Often Should a Subsoil Drainage Pit Be Inspected or Maintained?

To ensure appropriate functioning, you should check and maintain your subsoil drainage pit on a regular basis. The frequency of checking and maintenance timetable will rely on factors such as local rules and the specific conditions of your drainage system.

Can a Subsoil Drainage Pit Be Used to Collect and Recycle Rainwater for Irrigation Purposes?

A subsoil drainage pit can be beneficial for collecting rainwater and utilising it for irrigation. The size of the pit depends on factors such as rainfall intensity and soil permeability.

What Are Some Common Signs That Indicate a Subsoil Drainage Pit May Be Malfunctioning or in Need of Repairs?

To calculate the size of a subsoil drainage pit, you need to consider factors such as soil type, rainfall intensity, and the area to be drained. It’s important to properly design and maintain the pit to prevent blockages and ensure effective drainage.

Conclusion

In conclusion, calculating the size of a subsoil drainage pit involves the following steps:

  • Assessing drainage requirements: This involves considering factors such as the amount of surplus water that needs to be managed and the potential for flooding or water damage.
  • Determining average rainfall: It is important to have an understanding of the average amount of rainfall in the area where the subsoil drainage pit will be located.
  • Working out surface area: This step involves measuring the surface area that will contribute to the runoff that needs to be managed by the drainage pit.
  • Estimating percolation rate: The percolation rate refers to how quickly water can penetrate the soil. This information helps determine how quickly the drainage pit needs to be able to handle the influx of water.
  • Determining depth: The depth of the drainage pit is another crucial factor in calculating its size. This measurement is influenced by various factors, including the water table level and the desired level of water storage capacity.
  • Calculating necessary volume: By considering the surface area, average rainfall, percolation rate, and desired depth, it is possible to calculate the volume of water that the drainage pit needs to be able to handle.
  • Selecting the correct drainage pipe size: Finally, it is essential to choose the appropriate size of drainage pipe to ensure efficient water flow and prevent clogging.

By adhering to these steps, you can ensure the subsoil drainage pit is sized correctly to effectively manage surplus water and prevent flooding or water damage.

If you need professional assistance with your subsoil drainage pit, speak to us today by calling 022 444 6474 or emailing info@complexplumbing.co.nz.

Do You Need Drainage Behind a Retaining Wall?

Drainage behind a retaining wall

Much like a well-placed brick in the foundation of a robust debate, drainage assumes a crucial role behind a retaining wall. But is it truly necessary? The answer resides in the fragile equilibrium between water and stability.

Without appropriate drainage, the weight of water can exert pressure against the wall, generating hydrostatic pressure that can threaten its structural integrity. But fear not, as there are solutions to this damp predicament.

In this discussion, we will delve into the significance of drainage for retaining walls, the potential problems that may surface without it, and the various options on hand to assure the longevity and efficiency of these structures.

So, steel yourself and prepare to uncover the secrets of a well-drained retaining wall.

Importance of Drainage for Retaining Walls

The necessity of effective drainage for retaining walls can’t be overstated as it underpins their stability and longevity. One of the key elements to consider in relation to retaining wall drainage is the management of water behind the wall. If drainage is inadequate, water can accumulate behind the wall, resulting in increased pressure on the structure. Over time, this can result in the wall shifting, cracking, or even collapsing.

To circumvent such problems, it’s vital to establish a system that efficiently drains water away from the wall. This can be accomplished through the utilisation of drainage pipes or weep holes. These constituent parts enable water to flow unimpeded, averting any build-up behind the wall. By channelling the water away from the structure, the pressure is diminished, ensuring the stability of the retaining wall.

Additionally, effective drainage helps to avoid the build-up of excess moisture, which can trigger the proliferation of mould, mildew, and other harmful organisms. By allowing water to drain away efficiently, you can safeguard the wall from potential damage caused by these unwanted intruders.

Hydrostatic Pressure and Wall Failure

Hydrostatic pressure, brought about by water accumulating behind a retaining wall, poses a significant risk of wall failure. When water isn’t properly drained, it can accumulate behind the wall, exerting pressure on the structure. This pressure can prompt the wall to shift, crack, or even collapse. To avert such failures, it’s crucial to have adequate drainage behind the retaining wall.

Without proper drainage, the water behind the wall has no means to escape, leading to an increase in hydrostatic pressure. This pressure pushes against the wall, causing it to weaken over time. The increased load can surpass the wall’s capacity, resulting in failure.

By incorporating drainage systems, such as weep holes and drainage pipes, the water is directed away from the wall, relieving the hydrostatic pressure. These drainage systems enable water to flow freely, preventing the accumulation of water and reducing the risk of wall failure.

Guaranteeing proper drainage behind a retaining wall is essential for maintaining the wall’s integrity and stability. By preventing the buildup of hydrostatic pressure, drainage systems aid in preventing wall failure and extending the lifespan of the structure.

Drainage Options for Retaining Walls

Now let’s delve into the crucial topic of drainage options for retaining walls. Proper drainage is essential to avert water buildup and potential harm to the wall.

Various types of drainage systems are on offer, including:

  • Geofabric layers
  • Geotextile socks
  • Backfill aggregate
  • Drainage pipes with perforations

These options play a pivotal role in assuring the lifespan and sturdiness of the retaining wall by managing water flow effectively.

Importance of Drainage

To ensure the stability and longevity of a retaining wall, proper drainage is essential. Without adequate drainage, water can accumulate behind the wall, creating hydrostatic pressure that can cause the wall to shift or collapse. There are various drainage options available for retaining walls, including geofabric layers, geotextile socks, backfill aggregates, and drainage pipes with perforations. These alternatives help to channel water away from the wall, preventing water pressure buildup. Additionally, weep holes play a vital role in relieving hydrostatic pressure by allowing water to escape from behind the wall. Regular maintenance, such as checking and cleaning weep holes, is necessary to ensure proper drainage and prevent wall failure. Proper drainage not only secures the stability of the retaining wall but also protects surrounding structures, prevents erosion, and prolongs the wall’s longevity.

Importance of Drainage
– Secures stability of the retaining wall
– Prevents water pressure accumulation
– Protects surrounding structures
– Prevents erosion
– Prolongs the wall’s longevity

Types of Drainage Systems

Proper drainage is crucial for retaining walls to ensure stability and prevent build-up of water pressure that can lead to shifting or collapse.

There are several types of drainage systems that can be utilised for retaining walls.

One option is a French drain, which comprises a perforated pipe in a gravel-filled trench. This system redirects water away from the retaining wall, preventing pressure build-up.

Another option is the use of weep holes, which are small openings in the retaining wall that allow water to drain out, relieving hydrostatic pressure.

Toe drains, located at the base of the wall, collect and drain water away from the wall, ensuring proper drainage.

Additionally, using gravel as backfill behind the wall promotes water flow and prevents soil saturation.

Lastly, a geofabric layer made from polyester fibres can be utilised for drainage and filtering, promoting effective water drainage.

Proper Drainage Setup for Retaining Walls

Ensuring appropriate drainage for retaining walls is crucial for their stability and longevity. Without sufficient drainage, water can accumulate behind the wall, exerting pressure that can cause shifting or collapse. To help you comprehend the components of a proper drainage setup for retaining walls, let’s examine the table below:

Components Function Importance
Geofabric layer Filters water and prevents soil erosion Crucial for maintaining wall integrity
Geotextile sock Wraps around drainage pipes to avert blockage Ensures effective water flow and stops blockages
Backfill aggregate Provides a path for water to drain through Allows water to move away from the wall
Drainage pipes Collect and divert water away from the wall Prevents water build-up and hydrostatic pressure
Weep holes Permit water to drain out of the wall Releases hydrostatic pressure and prevents water accumulation

Longevity and Drainage of Retaining Walls

The longevity and stability of retaining walls are greatly enhanced by good drainage. Without adequate drainage, water can build up behind the wall, resulting in increased pressure, erosion, and settlement.

Here are three vital components of effective retaining wall drainage to prevent these problems:

  1. Weep holes: These small outlets are strategically positioned along the base of the wall to allow water to escape. By providing a means for water to exit, weep holes alleviate pressure and prevent hydrostatic build-up.
  2. Gravel backfill: A layer of gravel situated behind the retaining wall serves as a drainage medium. This allows water to move freely and prevents soil saturation, thereby facilitating proper drainage and lowering the risk of wall failure.
  3. Toe drains: In certain circumstances, toe drains might be required to reroute water away from the base of the retaining wall. These drains are typically installed at the base of the wall, capturing water and directing it to an appropriate outlet, such as a storm drain or a natural incline.

Potential Problems Without Drainage for Retaining Walls

Without sufficient drainage, retaining walls may encounter various potential problems that could undermine their stability and lifespan. A primary issue is the pressure accumulation behind the wall. When water isn’t drained away correctly, it can build up and exert significant pressure on the wall. This increased pressure could result in the shifting or even collapse of the retaining wall.

When water is absorbed into the soil behind the retaining wall without proper drainage, it creates hydrostatic pressure. This pressure pushes against the wall, leading it to bow or tilt. Over time, the constant pressure can weaken the structural integrity of the retaining wall, making it vulnerable to failure.

Apart from the pressure issue, poor drainage can also lead to erosion and settlement. When water isn’t drained away effectively, it can erode the soil behind the wall, causing it to wash away. This erosion can result in the wall losing its support and stability. Settlement can also occur when water isn’t properly drained, causing the ground to shift and sink.

Moreover, without sufficient drainage, standing water can accumulate behind the retaining wall. This standing water can attract insects and encourage the growth of mould and mildew, compromising the aesthetics and functionality of the wall.

Frequently Asked Questions

What Should You Put Behind a Retaining Wall?

You should place backfill options, drainage materials, and moisture control behind a retaining wall. This contributes to preventing pressure buildup, erosion, and the detrimental effects of rainwater, ensuring the stability and longevity of the wall.

Do You Need Weeping Tile Behind a Retaining Wall?

Yes, you require weeping tile behind a retaining wall. Setting up weeping tile permits correct drainage, prevents soil erosion, and assists in alleviating hydrostatic pressure. It is a vital component for the long-term durability of the retaining wall.

What Happens if You Don’t Backfill a Retaining Wall?

Without appropriate backfilling, potential repercussions encompass soil erosion and structural instability. The absence of suitable drainage behind a retaining wall can lead to augmented water pressure, causing shifting or collapse.

Do Retaining Walls Need Weep Holes?

Indeed, retaining walls require weep holes for appropriate drainage. Weep holes permit moisture to escape, averting water accumulation and potential harm to the wall. They are a crucial component of retaining wall design and upkeep.

Conclusion

In conclusion, appropriate drainage behind a retaining wall is vital for its stability and longevity. Without sufficient drainage, water accumulation can lead to increased pressure and potential damage to the wall.

Implementing drainage systems like weep holes, gravel backfill, and drainage pipes helps divert water away from the wall, preventing issues such as erosion, bulging, or collapse.

Regular maintenance and checking for proper drainage are fundamental to ensure the effectiveness and durability of the retaining wall.

If you need help with your drainage, contact us now by calling 022 444 6474 or emailing info@complexplumbing.co.nz.

How to Connect a Drainage Channel to a Drain

Drainage channel connecting to drain

They say that water always finds its way, but when it comes to connecting a drainage channel to a drain, you need to ensure it finds the correct route.

So, how do you go about it? Well, let’s just say that it necessitates a careful equilibrium of precision and skill.

From measuring and cutting the necessary pieces in centimetres to securing the connections and checking for any adjustments, there’s a lot that goes into this process.

In this article we’ll explain how to successfully connect a drainage channel to a drain and guarantee a smooth flow of water.

Assessing the Drainage Needs of Your Outdoor Area

To accurately assess the drainage needs of your outdoor area, begin by understanding the purpose and importance of connecting the ACO channel to a 90-degree bend for appropriate water flow. This connection plays a vital role in directing water away from your outdoor space, preventing flooding and water damage.

By connecting the ACO channel to the 90-degree bend, you ensure that water flows smoothly and efficiently through the drainage system, reducing the risk of blockages and overflow. It’s important to note that connecting the ACO channel to a 90-degree bend is necessary for effective drainage, as it allows water to change direction and continue its path towards the drain.

Failing to make this connection correctly can result in stagnant water and potential water damage to your property. Therefore, it’s crucial to understand the purpose and significance of this connection and ensure its proper installation.

Choosing the Right Drainage Channel for Your Project

For your project, selecting the appropriate drainage channel is vital to ensure effective water flow and avert any potential problems. Various factors must be taken into account when choosing the right drainage channel, such as the materials, proper installation techniques, and maintenance requirements.

With regard to drainage channel materials, numerous options are available, including concrete, plastic, and metal. Each material has its own benefits and drawbacks. Concrete channels are robust and can withstand heavy loads, but they may necessitate more maintenance. Plastic channels are lightweight and straightforward to install, but they may not be as robust as concrete. Metal channels, like stainless steel, are sturdy and resistant to corrosion, but they can be more costly.

Appropriate installation techniques are vital to ensure the effectiveness of the drainage channel. This includes correctly positioning the channel, ensuring a secure fit, and connecting it to the drain for water disposal. It’s crucial to follow the manufacturer’s instructions and use the appropriate tools and materials for installation.

Maintenance of the drainage channel is also crucial to ensure its longevity and functionality. Regular cleaning and inspections should be conducted to remove any debris or blockages that may hinder water flow. Additionally, any damages or wear should be repaired promptly to prevent further problems.

Preparing the Area for Installation

Before you can fit the drainage channel and link it to the drain, you must first ready the area for installation. This stage is critical to guarantee the correct operation and longevity of your drainage system. Here are five key tasks you need to complete when readying the area:

  • Grading the surface: Begin by grading the surface where the drainage channel will be fitted. This involves creating a slope that allows water to flow freely towards the drain. Use a spirit level and a grading rod to measure and adjust the slope as required.
  • Removing obstacles: Clear the area of any rubbish, stones, or vegetation that may obstruct the installation process or hinder proper water flow. This will assist in creating a smooth surface for the drainage channel.
  • Excavation depth: Measure and mark the location and dimensions for the installation. Then, excavate the area to the requisite depth, taking into account the channel’s specifications and the necessary slope. Ensure the excavation is wide enough to accommodate the channel and the 90-degree bend.
  • Compact the base: After excavation, compact the base to establish a stable foundation for your drainage system. Use a compactor or tamper to compress the soil and eliminate any air pockets. Ensure the base is level to prevent future drainage issues.
  • Verify alignment: Before proceeding with the installation, double-check the alignment of the excavation and make any necessary adjustments. This will ensure that the drainage channel fits properly and allows for efficient water drainage.

Installing the Drainage Channel

Now let’s begin with the installation of the drainage channel. To ensure the precision of your measurements, take the time to meticulously measure the ACO channel and the 90-degree bend. This stage is vital for an accurate fit and efficient drainage.

Once you have your measurements, it’s time to position the channel in its designated spot. Ensure it’s aligned correctly and level with the surrounding surface.

If you encounter any problems during the installation, don’t panic. There are troubleshooting steps you can adopt to resolve them. One common issue is a loose fit between the ACO channel and the 90-degree bend. To rectify this, apply some lubricant to both ends and firmly push them together until they’re securely connected.

Additionally, ensure to connect the back edge of the channel to the ACO channel for added stability. If necessary, cut and measure additional pieces in centimetres to ensure proper alignment and make any necessary adjustments for a perfect fit.

Connecting the Drainage Channel to the Drain

Now it’s time to concentrate on linking the drainage channel to the drain.

The crucial points to consider are correct alignment and positioning, as well as ensuring a secure and sealed connection.

Proper Alignment and Positioning

To ensure a secure and watertight connection, align the ACO channel and the 90-degree bend properly before joining them. Here are some tips to help you with the alignment and positioning:

  • Apply lubricant to the connection to facilitate a smoother joining process.
  • Check for any gaps or misalignment between the ACO channel and the 90-degree bend to ensure a secure fit.

Make certain to tighten the connection properly to prevent any potential leaks in the drainage system.

Troubleshoot any issues that may crop up during the alignment process, such as obstructions or uneven surfaces.

Regularly inspect and maintain the connection to ensure its stability and functionality over time.

Secure and Seal Connection

After ensuring a proper alignment and positioning of the ACO channel and the 90-degree bend, the next step is to secure and seal the connection by attaching the drainage channel to the drain.

To prevent leaks and ensure a tight connection, it’s important to apply a lubricant to the joint. This will allow for a smooth and straightforward installation. Make sure there are no gaps or misalignments between the channel and the drain to achieve a gap-free connection.

Tighten the connection firmly to eliminate any potential leaks. A secure and sealed connection is crucial for the efficient functioning of the drainage system, as it ensures that water flows smoothly from the channel into the drain without any leaks or blockages.

Testing and Maintaining the Drainage System

Regularly inspect your drainage system for blockages, debris, or any indications of damage to ensure optimal operation. Testing and maintaining your drainage system is crucial for its longevity and efficiency.

Here are some testing methods, troubleshooting common issues, and DIY maintenance tips to help you keep your drainage system in top condition:

  • Test the flow of water through the drainage channel: Pour water into the channel and observe how it drains. If it drains slowly or backs up, there may be a blockage that needs to be cleared.
  • Check for leaks or weak points in connections and seals: Examine all connections and seals for any signs of leaks or damage. Tighten loose connections and replace worn-out seals to prevent water leakage.
  • Clean and remove blockages: Regularly clean your drainage system to remove any debris, leaves, or sediment that may accumulate and cause blockages. Use a hose or a drain snake to clear any obstructions.
  • Monitor the surrounding area: Keep an eye on the area around the drainage channel for any signs of erosion, sinking, or pooling water. These may indicate a problem with the drainage system that needs to be addressed.
  • Consider professional maintenance: While DIY maintenance is important, it’s also wise to have a professional perform a thorough inspection and any necessary repairs on your drainage system to ensure its proper operation.

Frequently Asked Questions

What Does a Channel Drain Connect To?

To establish a connection for a drainage channel, you have a few possibilities. You can link it directly to a drain utilising a 90-degree bend or investigate alternative solutions depending on your specific installation requirements.

How Do You Install a Channel Drainage System?

To install a channel drainage system, gather necessary tools and follow the installation process. Common errors include incorrect measurements in metres and poor alignment. Connect the ACO channel to a 90-degree bend for efficient drainage.

Do Channel Drains Need to Be Set in Concrete?

Yes, channel drains ought to be set in concrete for stability and durability. Concrete provides a secure base, minimising misalignment and ensuring a tight connection. It’s the optimal choice for long-term reliability and performance.

Is a Channel Drain the Same as a Trench Drain?

A channel drain and a trench drain are similar in function, but they have key design and installation differences. Comprehending these differences is vital when considering drainage necessities.

Conclusion

In conclusion, linking a drainage channel to a drain necessitates careful measurement, proper assembly, and secure connections.

By following the steps outlined, you can effectively redirect water and prevent flooding in your outside area.

Remember to regularly test and maintain the drainage system to ensure its sustained effectiveness.

With these steps, you can successfully link a drainage channel to a drain for efficient water disposal.

If you want professional help with your drainage channel, speak to us today by calling 022 444 6474 or emailing info@complexplumbing.co.nz.


What Is Subsoil Drainage?

What Is Subsoil Drainage?

Are you fed up with constantly dealing with a perpetually waterlogged lawn that seems to turn into a muddy mess every time it rains? Well, you’re not alone. Many homeowners face the challenge of excess water in their gardens, which not only damages the landscape but also poses a threat to the stability of their buildings.

That’s where subsoil drainage comes in. But what exactly is subsoil drainage and how can it help you? In this discussion, we will explore the importance of subsoil drainage, the benefits it offers, different methods of installation, common problems that may arise, and maintenance tips to keep your drainage system in top form.

Importance of Subsoil Drainage

Subsoil drainage is vital for averting flooding, safeguarding foundations, and upholding a healthier landscape. Correct subsoil drainage plays a crucial part in managing water around your building and guaranteeing its stability. By initiating effective subsoil drainage systems, you can avert water from accumulating around your property, lessening the risk of flooding and damage. These drainage systems assist in redirecting surplus water away from the building, lessening the pressure on the foundation and minimising the potential for foundation movements.

In addition to averting flooding and safeguarding foundations, correct subsoil drainage also contributes to upholding a healthier landscape. When water is allowed to accumulate in the soil, it can lead to soil erosion and the formation of stagnant pools. This can create a breeding ground for mosquitoes and other pests, posing health risks to you and your family. By installing subsoil drainage systems, you can enhance soil quality, increase aeration, and promote a healthier environment for plants and vegetation to thrive.

It is important to note that installing a subsoil drainage system requires the expertise of a trained and licensed professional. They’ll assess the specific needs of your property and design a drainage system that effectively manages water flow. By investing in correct subsoil drainage, you can safeguard your property, avert flooding, and uphold a healthier landscape.

Benefits of Subsoil Drainage

Installing a suitable subsoil drainage system provides numerous benefits for your property and landscape. Here are four key advantages of subsoil drainage systems:

  1. Prevents waterlogged soils: Subsoil drainage aids in preventing water from building up in the soil, which can lead to root rot, stunted growth, and even plant death. By maintaining the soil well-drained, you can ensure healthier plants and a more vibrant landscape.
  2. Reduces health risks: Appropriate subsoil drainage also assists in eliminating puddles, which can become breeding grounds for bacteria and insects. By keeping your property clean and free from stagnant water, you can reduce the risk of health issues for you and your family.
  3. Protects foundations: Subsoil drainage plays a crucial role in protecting the foundation of your property. By efficiently managing water runoff, it reduces the risk of structural damage and soil subsidence, ensuring the stability and longevity of your building.
  4. Minimises soil erosion: Subsoil drainage systems help minimise soil erosion by preventing water from washing away the topsoil. By preserving the nutrient-rich topsoil, you can improve soil quality and promote healthy plant growth.

Methods of Subsoil Drainage Installation

To effectively implement subsoil drainage and reap its benefits, it’s crucial to comprehend the various methods of installation.

When it comes to fitting a subsoil drainage system, there are a few different options to consider. One common method is the use of underground pipes made from porous material. These pipes have holes that permit water to seep through whilst blocking soil and debris.

Another method is the use of rocks and pebbles to filter the water as it drains away. This can aid in preventing clogs and maintain the drainage system running smoothly.

Additionally, re-levelling the land can redirect water away from the property, providing an effective way to install subsoil drainage.

When deciding on the type of subsoil drainage to install, it’s important to consider the specific needs of your property and the extent of the drainage issues you’re facing.

Materials Used in Subsoil Drainage

One widely used material in subsoil drainage is porous underground pipes. These pipes are crafted to let water seep through whilst blocking soil and debris. The holes in the pipes are strategically positioned to ensure effective drainage.

Here are four materials commonly utilised in subsoil drainage systems:

  1. Porous Underground Pipes: These pipes are constructed from a porous material which allows water to flow through whilst preventing soil and debris from entering.
  2. Rocks and Pebbles: In some instances, rocks and pebbles are used to establish a filtering system for the water. These materials assist in removing any sediment or impurities before the water is drained away.
  3. Re-levelling the Land: Another material utilised in subsoil drainage is the land itself. By re-levelling the land, water can be redirected away from the property, preventing it from pooling and causing damage.
  4. Earthenware Field Tiles: Earthenware field tiles are clay pipes that have been utilised for centuries in subsoil drainage systems. These pipes are laid in trenches and connected to a cesspit or holding pit. They allow water to flow freely whilst preventing soil and debris from entering.

When installing a subsoil drainage system, it’s crucial to clean out any debris and ensure proper installation by a subsoil drainage expert. This will ensure optimal results and prevent any issues in the future.

Common Problems With Subsoil Drainage

Are you encountering problems with your subsoil drainage system? Let’s tackle some common issues that you might come across.

Firstly, the fitting process is crucial to the efficiency of your drainage system, so ensure it’s executed correctly.

Secondly, blockage and clogging can transpire due to debris or sediment buildup, leading to poor drainage.

Lastly, regular maintenance, such as cleaning and inspecting the system, can help avert and identify any potential problems early on.

Drainage System Installation

Improper fitting of subsoil drainage systems can result in typical issues that obstruct their efficacy. To guarantee a successful drainage system fitting, take into account the following:

  1. Engaging a professional: Fitting a subsoil drainage system necessitates expertise and knowledge. Engaging a qualified contractor will assure proper fitting and lessen the risk of future problems.
  2. Correct positioning: Positioning the drainage system in the right location is pivotal. It should be set to gather surplus water and direct it away from the property.
  3. Proper incline and grading: A well-designed drainage system should have the right incline and grading to guarantee efficient water flow. This prevents water from pooling and causing harm.
  4. Quality materials: Utilising top-quality materials for the fitting is essential for the longevity and efficacy of the drainage system. Inferior materials can result in frequent repairs and maintenance.

Blockage and Clogging

Blockage and clogging can significantly hinder the efficacy of subsoil drainage systems, potentially leading to property damage and health hazards. These issues often arise when soil, debris, or roots block the drain pipes. If not dealt with swiftly, blockages can cause water to accumulate in the garden, slow drainage, and unpleasant smells.

In severe instances, the water may even overflow into the property, resulting in damage and health risks. To prevent blockages, regular inspection and maintenance are crucial. Cleaning the drain pipes and removing any blockages can help maintain the system’s efficiency.

It’s advisable to hire a professional for a thorough assessment and to address any blockages without delay. By taking these preventive measures, you can avoid the inconvenience of waterlogged lawns and potential property damage caused by overflowing subsoil drainage.

System Maintenance Tips

Regularly inspecting and cleaning drain pipes is essential for maintaining the efficiency of subsoil drainage systems and preventing common problems. Here are some system maintenance tips to keep in mind:

  1. Prevent blockages: Regularly clean drain pipes to remove any debris or sediment that may accumulate and obstruct the flow of water.
  2. Check sump pump operation: Ensure that the sump pump is functioning properly and has a backup system in case of failure. This will help prevent water buildup and potential flooding.
  3. Repair leaks and fissures: Inspect the subsoil drainage system for any leaks or fissures and promptly repair them. This will prevent water seepage and ensure that the system operates efficiently.
  4. Maintain proper grading: Ensure that the surrounding landscape is properly graded to promote effective water flow away from the foundation. This will help prevent water accumulation and potential damage to retaining walls or structures.

Maintenance Tips for Subsoil Drainage Systems

To ensure the proper functionality and effectiveness of your subsoil drainage system, it’s essential to regularly inspect for blockages, damages, and any signs of water accumulation. By conducting routine inspections, you can identify and deal with any problems promptly, averting further damage and costly repairs.

One significant aspect of maintenance is keeping the drain pipes and sump pump clean. Over time, rubbish and sediment can build up, leading to obstructions and reduced water flow. Regularly cleaning these components will help maintain effective water removal and prevent any potential backups.

It is also crucial to test the pump operation and backup systems. This ensures that they’re functioning properly and ready to handle any excess water. Regular testing will give you peace of mind, knowing that your subsoil drainage system is prepared for any potential flooding situations.

If you notice any leaks or cracks in the subsoil drainage system, it’s vital to repair them swiftly. These problems can lead to water accumulation, which can cause damage to your property’s foundation or surrounding areas. By dealing with these problems quickly, you can prevent further damage and maintain the integrity of your subsoil drainage system.

Lastly, ensure to maintain proper grading and drainage away from the foundation. This will help ensure efficient water flow and prevent water from pooling around your property. Additionally, consider installing retaining walls if necessary to redirect water away from vulnerable areas.

Hiring a Professional for Subsoil Drainage Installation

For optimal results and peace of mind, it’s recommended to engage a professional for the installation of your subsoil drainage system. Here are four reasons why engaging a professional for subsoil drainage installation is crucial:

  1. Proper Design and Installation: Certified drainlayers have the expertise to design and install a subsoil drainage system tailored to your property’s specific needs. They’ll ensure that the system effectively prevents water accumulation and safeguards your property’s foundation.
  2. Compliance with Regulations: Professional subsoil drainage installation ensures compliance with regulations and standards. This includes proper discharge options, ensuring that the water is safely directed away from your property.
  3. Prevention of Common Mistakes: Professionals have the knowledge and experience to prevent common mistakes in subsoil drainage installation, such as avoiding blockages caused by tree roots. This helps maintain the system’s efficiency and prevents costly repairs in the future.
  4. Additional Services: Engaging a subsoil drainage expert like GSM Plumbing can also provide additional services, such as stormwater drainage solutions. This can help minimise the risk of flooding and further safeguard your property.

Frequently Asked Questions

What Is the Meaning of Subsoil Drainage?

Subsoil drainage is significant for averting flooding and harm to your home and garden. It plays a vital role in agriculture by managing water levels and enhancing soil conditions. There are various types of systems, but common problems can emerge. However, it also has environmental benefits.

What Are the Advantages of Subsoil Drainage System?

Subsoil drainage systems boast numerous benefits. They avert water build-up, stabilise construction, and are necessary for roads and roundabouts. They enhance safety and convenience, but the installation, maintenance, expense, and environmental impact should be taken into account.

What Are the Methods of Subsoil Drainage?

To enhance soil compaction, fit a drainage pipe into the subsoil. This assists in lowering the water table and wards off waterlogging. Techniques encompass French drains and perforated pipes, which proficiently eliminate surplus water from the soil.

What Is the Discharge of Subsoil Drainage?

The discharge of subsoil drainage refers to the elimination of surplus water from the system. It assists in managing water, enhancing soil health, averting waterlogging, and promoting sustainable water management. Certified drainlayers ensure correct installation and discharge.

Conclusion

In conclusion, subsoil drainage is a vital system that aids in preventing water damage, stabilising the ground, and enhancing soil health.

It’s crucial to employ a professional drainlayer for the installation to ensure the system’s proper functioning and longevity.

Regular maintenance and addressing common issues are necessary to keep the subsoil drainage system in good condition.

On the whole, subsoil drainage provides numerous benefits and is essential for maintaining the integrity of buildings and landscapes.

What Is a Lateral Drainage System?

Lateral drainage system

Picture a maze of concealed pipes resting beneath the surface, silently transporting the waste and surplus water from your property to the vast breadth of the main sewage system.

This complex network, known as a lateral drainage system, plays a key role in maintaining the cleanliness and functionality of our urban infrastructure. But what exactly is a lateral drainage system, and how does it function?

In this discussion, we will illuminate the components, functions, and significance of this essential system, as well as explore the responsibilities associated with its maintenance.

Components of a Lateral Drainage System

In a lateral drainage system, the components comprise of lateral drains that transport wastewater from your property to the public sewer system. These drains are typically situated outside your property and are tasked with conveying the wastewater away from your home. As a homeowner, it’s your responsibility to maintain the portion of the drainage system that extends from the public right-of-way to your house. In some instances, you may also be obligated to handle repairs up to the footpath or berm.

To ensure the efficient functioning of the lateral drain, routine maintenance is crucial. One suggested method is to carry out a CCTV Drain Survey. This involves utilising a small camera attached to a flexible cable that’s inserted into the drain to inspect its condition. By doing this, you can identify any issues such as cracks or leaks that may be present. It’s vital to address these problems promptly to prevent further damage to the lateral drain and avert potential sewage backups or blockages.

Lateral drains have various access points, including internal and external cleanouts, floor drains, and water traps. These access points are designed to allow for easy inspection and maintenance of the lateral drain. Additionally, they help prevent sewer gases and odours from entering your property.

Functions of a Lateral Drainage System

To fully comprehend the functions of a lateral drainage system, it’s necessary to acknowledge the crucial role it plays in the effective removal of wastewater from your property. Here are the functions of a lateral drainage system:

  1. Transporting wastewater: The lateral drain is tasked with transporting wastewater from your property to the public sewer network. It links your property’s drainage system to the primary sewer system situated beyond your property’s boundary. This assures that the wastewater is correctly disposed of, thus eliminating any health or environmental hazards.
  2. Avoiding blockages: A well-operating lateral drainage system aids in avoiding clogged drains. Regular maintenance and inspection of the lateral drain can assist in identifying any potential issues and dealing with them before they escalate into significant problems. This includes clearing any rubble or tree roots that may hinder the flow of wastewater.
  3. Guaranteeing proper drainage: The lateral drainage system guarantees that wastewater is efficiently drained away from your property. It stops the accumulation of water, which can result in flooding or water damage. By adequately maintaining your lateral drain, you can help prevent any backups or overflows during periods of heavy rain or high water usage.

Importance of a Lateral Drainage System in Urban Infrastructure

A well-maintained lateral drainage system is crucial for the appropriate functioning of urban infrastructure. Lateral drains are integral in transporting wastewater from homes to the public sewer main, ensuring the efficient disposal of wastewater in urban areas. As a homeowner, it is your obligation to maintain the lateral drains outside your property’s boundary. This is significant because any fractures or leaks in the lateral drains can lead to backups in cellars, causing property damage and health hazards. By keeping your lateral drainage system in good condition, you contribute to the overall well-being of the urban infrastructure.

To further emphasise the importance of a well-maintained lateral drainage system, let’s take a gander at the following table:

Importance of a Lateral Drainage System in Urban Infrastructure
– Prevents cellar flooding and property damage
– Ensures proper disposal of wastewater
– Contributes to the overall health and cleanliness of the city
– Maintains the integrity of the public sanitary sewer system

As you can discern, a well-functioning lateral drainage system is crucial for preventing cellar flooding and property damage. It also plays a significant role in maintaining the overall health and cleanliness of the city. By properly disposing of wastewater, the system ensures that the public sanitary sewer system remains in good condition. Therefore, it is essential to regularly maintain and monitor your lateral drainage system to avoid any issues and contribute to the efficient functioning of urban infrastructure.

Who Is Responsible for Maintaining a Lateral Drainage System?

As a homeowner, it’s your responsibility to maintain the lateral drainage system within your property boundaries. This system comprises the lateral drains that are typically situated outside the boundary of your property. Here are three key points to assist you in understanding who’s accountable for maintaining a lateral drainage system:

  1. Public Lateral Drains: Local water and sewage companies are responsible for maintaining public lateral drains. These drains are part of the wider drainage network and are usually situated in public areas or shared spaces. If you suspect that a drain on your property is public, it’s vital to contact your local water company to confirm their responsibility for its maintenance.
  2. Private Lateral Drains: Property owners, like yourself, are responsible for maintaining private lateral drains that fall within their property boundaries. These drains are specifically connected to your property and carry wastewater away from your home. It’s crucial to regularly inspect and maintain these drains to ensure they function correctly and prevent any blockages or flooding issues.
  3. Permission and Regulations: If you’re planning any construction or building work near a public lateral drain, you must seek permission from the local water company. They’ll have specific regulations in place to ensure the protection and maintenance of these drains.

Building Over a Lateral Drainage System: What You Need to Know

Understanding the rules and requirements for building over a lateral drainage system is crucial for homeowners. If you’re planning to construct over a lateral drainage system that’s situated outside the boundary of your property, there are several things you need to be aware of.

Firstly, you must ensure that you have obtained the necessary consent from the local water board. This consent usually takes the form of a build over agreement.

Before commencing construction, it’s important to carry out a CCTV drain survey to pinpoint the exact position of the lateral drain and its connections. This will assist you in ensuring that your new building or structure isn’t blocking or damaging the existing drain.

In some instances, you may need to reroute the lateral drain by installing a new pipe within your property’s boundaries. This new pipe will then link to the public sewer main. Once again, this must be done in line with the rules and requirements laid out by the local water board.

Failure to secure permission to build over a lateral drain can result in difficulties in obtaining certifications and possibly even the removal of your structure. Therefore, it’s crucial to adhere to the necessary procedures and obtain the required consent prior to proceeding with your construction plans.

Frequently Asked Questions

What Is a Lateral Drainage?

A lateral drainage system is a crucial component of any property’s wastewater management. It efficiently transports wastewater from your house to the public sewer system. Regular maintenance is essential to avoid common issues such as blockages and leaks.

What Is the Difference Between a Sewer Main and a Lateral?

The distinction between a sewer main and a lateral can be clarified by comprehending their roles in waste disposal. Common misunderstandings may result in neglecting the importance of upkeep, possibly leading to problems. Repair choices, cost considerations in New Zealand dollars, and the environmental impact should be taken into account when deciding between DIY and professional help.

What Does Lateral Mean in Plumbing?

In plumbing, lateral implies a side or branch. It pertains to the pipes that link individual properties to the public sewer system. One should comprehend lateral pipe installation, maintenance, blockages, repair, inspection, cleaning techniques, system components, and the procedure of installation, all utilising New Zealand metrics such as dollar amounts and measurements.

What Is a Lateral Water System?

Lateral water flow is vital for preventing water damage. Lateral drains play a crucial role in this by conveying wastewater to the sewer main. Regular maintenance and repairs are necessary to boost efficiency and prevent common issues with lateral water systems.

Conclusion

In summing up, a lateral drainage system is a vital element of urban infrastructure, accountable for linking properties to the main sewage system. It comprises of pipes situated outside or within property boundaries, and its upkeep and repair responsibilities fluctuate depending on whether it’s public or private.

Comprehending the components and functions of a lateral drainage system is crucial for property owners and local water and sewage companies to ensure effective management of wastewater.

How to Pour a Concrete Drainage Channel

A concrete drainage channel that has been poured

Proper drainage is crucial in preventing water damage to your property. If you’re looking to effectively redirect water away from your home or garden, pouring a concrete drainage channel is a practical and long-lasting solution.

In this guide, we will guide you through the steps to create a functional and durable drainage channel that will keep your property safe from water-related issues.

So, let’s get started and ensure that your drainage needs are met with precision and efficiency.

Gather the Necessary Tools and Materials For Pouring The Concrete Drainage Channel

To gather the necessary tools and materials for pouring a concrete drainage channel, begin by preparing the required tools such as a skid loader bucket, stakes, five by tens, a laser, and string lines. These tools will assist you in accurately measuring and leveling the area where you’ll be pouring the concrete slab.

Additionally, it’s essential to acquire the required materials for the project. You’ll need concrete, which will form the base of the drainage channel, providing a robust and long-lasting surface. Stone is also necessary for support, ensuring that the channel remains stable over time.

Don’t forget to gather safety gear such as gloves, goggles, and a hard hat to protect yourself during the construction process. It’s crucial to have the appropriate measuring and levelling instruments to ensure accurate grade correction. This will help you achieve the desired slope for effective water drainage.

Lastly, consider having extra forming lumber on hand in case any unexpected adjustments need to be made during the project. By gathering these necessary tools and materials, you’ll be well-prepared to create a successful and efficient trench drain.

Prepare the Area for Pouring

To prepare the area for pouring the concrete drainage channel, you need to begin by clearing the area of any rubbish, obstructions, and excess soil. This will ensure that you have a clean and level surface to work with.

Next, set up the formwork and verify the slope and elevation of the area to ensure proper water flow and drainage.

Clear the Area

Before pouring the concrete drainage channel, it’s crucial to tidy the area of any rubbish, vegetation, or blockages to ensure a clean and level surface. Eliminate any stones, branches, or other items that could hinder the pouring process.

Investigate for any underground utilities or obstructions that may be concealed beneath the surface and could cause problems during installation. It’s vital to have a stable foundation for the drainage channel, so ensure the area is appropriately compacted and graded. This will aid in preventing any future shifting or settling of the channel.

In addition, make certain you have obtained any necessary permits and approvals for the construction in the designated area. Lastly, ensure there’s enough space for the equipment and materials needed for pouring the concrete.

Set up Formwork

Prepare the area for pouring the concrete drainage channel by excavating the ditch to the appropriate depth and setting up formwork. Here’s what you need to do:

  1. Excavate the ditch to the depth of the drain plus the thickness of the concrete. This will ensure that the channel fits perfectly and allows for proper water flow.
  2. Install the required reinforcement bars and set the elevation of the top of the footer concrete as the flow line of the trench drain. This will provide stability and support to the channel.
  3. Pour the concrete trench drain footer and make sure to create a smooth inside surface. This will improve the flow of water through the channel.
  4. Set up formwork on the inside of the trench drain, bracing them to prevent any movement during the concrete placement. Double and triple check the width and stability of the formwork before pouring the concrete.

Build the Formwork for the Drainage Channel

Begin by ensuring you’ve correctly designed and chosen the frame and grate for your drainage channel, as this will stipulate the specifics for constructing the formwork.

Building the formwork for the drainage channel is a vital phase in the construction procedure. It provides the essential structure and form for pouring the concrete. To construct the formwork, you’ll need to gather the necessary materials, such as plywood, stakes, and nails.

Start by measuring and marking the channel dimensions on the ground, using metric measurements. Then, cut the plywood into panels according to these dimensions. Fasten the panels together using nails and reinforce the corners with stakes. Make sure the formwork is level and stable before moving forward.

In addition, it’s important to include an embedded frame within the formwork. This frame offers support for the grates and avoids stress on the concrete. It’s crucial for ensuring a prolonged lifespan for the drainage channel.

Mix and Pour the Concrete

Now that you have successfully constructed the formwork for the drainage channel, it’s time to mix and pour the concrete to finalise the construction process.

Follow these steps to ensure a successful pour:

  1. Start by preparing the concrete mix in accordance with the manufacturer’s instructions. This may require adding water and mixing until you achieve a smooth and manageable consistency.
  2. Pour the concrete into the trench drain form, initiating from one end and progressing your way towards the other. Ensure the concrete is evenly dispersed and reaches the desired level.
  3. Utilize a concrete vibrator to eliminate air pockets and ensure proper compaction of the concrete. This will assist in preventing any future cracking or settling.
  4. Smooth the surface of the poured concrete utilizing a trowel. This won’t only provide it with a clean and level finish but also aid in ensuring proper drainage.

Remember to give additional attention to the edge of the trench, as this is where water will be entering the drainage channel. Take your time to ensure it’s correctly formed and that the concrete is well-compacted.

Once you have poured the concrete, allow it to cure in line with the recommended time frame before removing the forms and proceeding with further installation.

Level and Smooth the Surface of the Channel

Smooth out any imperfections and ensure a level surface for the concrete drainage channel.

After pouring the concrete, it’s vital to level and smooth the surface to create a practical and visually pleasing channel. Begin by utilising a straight edge or a level tool to check the surface for any uneven areas. If you discover any, use a trowel to smooth them out.

Pay meticulous attention to the slope of the channel, as it should allow for proper water flow towards the outlet. Use a float to create a smooth finish on the surface of the concrete. Glide the float over the channel in a back-and-forth motion, applying light pressure. This will help remove any remaining imperfections and create a polished look.

Take the time to carefully inspect the surface for any low spots. If you discover any, fill them in with additional concrete to ensure an even surface.

A level and smooth channel won’t only enhance the functionality of your drainage system but also provide a professional and finished appearance.

Allow the Concrete to Cure

Now that you’ve poured the concrete for your drainage channel, it’s crucial to let it cure properly. Curing time is vital for the concrete to achieve its maximum strength and durability.

During this process, it’s important to shield the curing concrete from extreme weather conditions and to avoid disturbing it to maintain its integrity.

Curing Time for Concrete

To ensure the robustness and longevity of your concrete, it’s crucial to allow ample time for curing. Curing time for concrete refers to the duration it takes for the concrete to fully harden and achieve its peak strength.

Here are four key factors to consider when determining the curing time for your poured concrete drainage channel:

  1. Temperature: Higher temperatures can hasten the curing process, while lower temperatures can decelerate it. It’s vital to supervise the temperature and adjust the curing time correspondingly.
  2. Moisture: Adequate moisture levels are crucial for the concrete to cure effectively. Excessive moisture can result in feeble concrete, while inadequate moisture can lead to cracking and shrinkage.
  3. Concrete mix: The composition of your concrete mix can influence the curing time. Different mixes require various curing times, so ensure to adhere to the manufacturer’s instructions.
  4. Thickness: Thicker concrete sections will necessitate extended curing times to ensure complete hardening and strength development.

Importance of Proper Curing

Proper curing of the concrete is crucial to ensure its strength and durability over time. Curing is the process of maintaining moisture in the concrete to help it develop its maximum strength. By giving the concrete enough time to cure, you can minimise the risk of cracks and improve its resistance to wear and tear.

Adequate curing also enhances the concrete’s ability to withstand heavy loads and harsh weather conditions. It prevents surface defects and ensures a smoother finish for the drainage channel. When pouring a concrete drainage channel in a trench, allowing the concrete to cure is essential.

Remove the Formwork and Finish the Channel

Once the concrete has cured sufficiently, you can proceed to remove the formwork and put the finishing touches on the drainage channel. Here’s what you need to do to complete the process:

  1. Carefully remove the formwork: Begin by taking off the wooden or metal formwork that was used to shape the channel. Use a crowbar or hammer to loosen any nails or screws holding it in place. Gradually and methodically disassemble the formwork, ensuring that you don’t damage the concrete or the surrounding area.
  2. Smooth out the edges: After removing the formwork, you may notice rough or uneven edges on the channel. Use a trowel or a concrete edger to smooth out these imperfections. Work your way along the entire length of the channel, applying even pressure to achieve a neat and finished look.
  3. Clean the surface: Once the edges are smoothed, it’s essential to clean the surface of the channel. Remove any debris, dirt, or excess concrete using a broom or a brush. This step will ensure that the channel is free from any obstructions and ready for use.
  4. Apply a sealant: To protect the concrete and enhance its longevity, consider applying a sealant to the channel. A concrete sealer will help prevent water penetration, reduce the risk of cracks, and prolong the lifespan of the drainage channel. Follow the manufacturer’s instructions for proper application and allow the sealant to dry thoroughly before using the channel.

Frequently Asked Questions

What Do You Mix With Concrete for Drainage Channel?

To enhance drainage efficiency, mix concrete with additives such as pea shingle or crushed rock. Utilising a polymer modified concrete mix for drainage channels provides advantages such as heightened strength and improved drainage flow.

How Do You Install a Drainage Channel in Concrete?

To install a drainage channel in concrete, first ascertain the type of drainage channel required. Then, excavate the area, set the moulds, pour the concrete, and finish the channel. Ensure to adhere to proper installation guidelines for a successful result.

Do Channel Drains Need to Be Set in Concrete?

Indeed, channel drains require setting in concrete. This guarantees stability and hinders shifting or harm. Utilising precast drainage channels provides benefits such as simple installation and robustness. Common blunders to steer clear from encompass incorrect alignment and insufficient support for the grates.

What Is the Slope of a Concrete Drainage Channel?

The gradient of a concrete drainage channel is crucial for efficient water flow. It should be uniform and consistent along its length. A minimum gradient of 1 millimetre per 30.48 centimetres is typically utilised, but a steeper gradient may be necessary in certain situations.

Conclusion

By following the steps outlined in this article and utilising the proper tools and materials, you have crafted a robust and efficient solution for managing water flow. Remember to allow the concrete to cure properly before removing the formwork and finishing the channel.

If you need us to install a drainage channel on your property, speak to us today by calling 022 444 6474 or emailing info@complexplumbing.co.nz.